Welcome 👋
Hey there! Today let's have a look at the crucial part of modern web development process - testing. We will make first project set-up to implement tests with Cypress testing framework and make our first test. So, no more waiting, let's go!
What is end-to-end testing?
As I said previously, end-to-end testing is part of modern software development lifecycle to test all parts of the application under "real life conditions". That's why it's called end-to-end. From testing an UI, to API calls and checking that data was stored, fetched and displayed correctly. So, basically you simulate user-like experience throughout the application.
Are they required? Nope. Are they recommended? Yes and yes.
Since nothing is perfect in this world, so do end-to-end (E2E, for short) tests - not perfect. There are pros and cons of E2E tests, let's talk about it.
Pros and Cons

Pros
- They test application from a user's POV 😊 - user has flawless experience
- They increase a test-coverage of your application 👨🔬 - feel confident of your code
- They minimize amount of bugs in production 🛡 - nobody likes bugs
- They verify the workflow 🧐 - you fail - they fail.
Cons
- They take time 🕒- slowing down the pipeline
- They are expensive 💰- a lot of man-power required
- They are hard to debug 😣 - thorough investigation required to find the issue
- They are quite hard to plan and write 😓 - put yourself in the user's shoes
Pros outweighs cons? Well, it's up to you and your team, but, it's better, tests will do the job, than users will be your E2E tests. So, let's start!
Prerequisites
First, let's make sure that our project is set-up correctly. For an example app we will use The Mother of all Demo Apps 🤣
Go to GitHub repo and clone project into your local machine.
~$ git clone git@github.com:cirosantilli/node-express-sequelize-nextjs-realworld-example-app.git

~$ cd node-express-sequelize-nextjs-realworld-example-app

~/node-express-sequelize-nextjs-realworld-example-app$ npm install
.
.
---------------------once everything is installed-----------------------------

~/node-express-sequelize-nextjs-realworld-example-app$ npm run dev
The project will run on your http://localhost:3000/. Open it in the browser and try it out, have fun signing in, making posts, browsing app. Try to get familiar a bit with the app and business logic. Btw it's a clone of Medium 🤣
Let the app run, do not stop it, keep the terminal window open for that process.
Once you're done with playing around, it's time for real stuff.
Project set-up
Now when you have your local app to test, let's go and set-up Cypress. In your project folder run:
npm install cypress --save-dev
We will use npm for the purpose of this post, but you can use yarn if you prefer it.
yarn add cypress --dev
Okay, so now let's run Cypress and make sure that it was installed properly.
npx cypress open
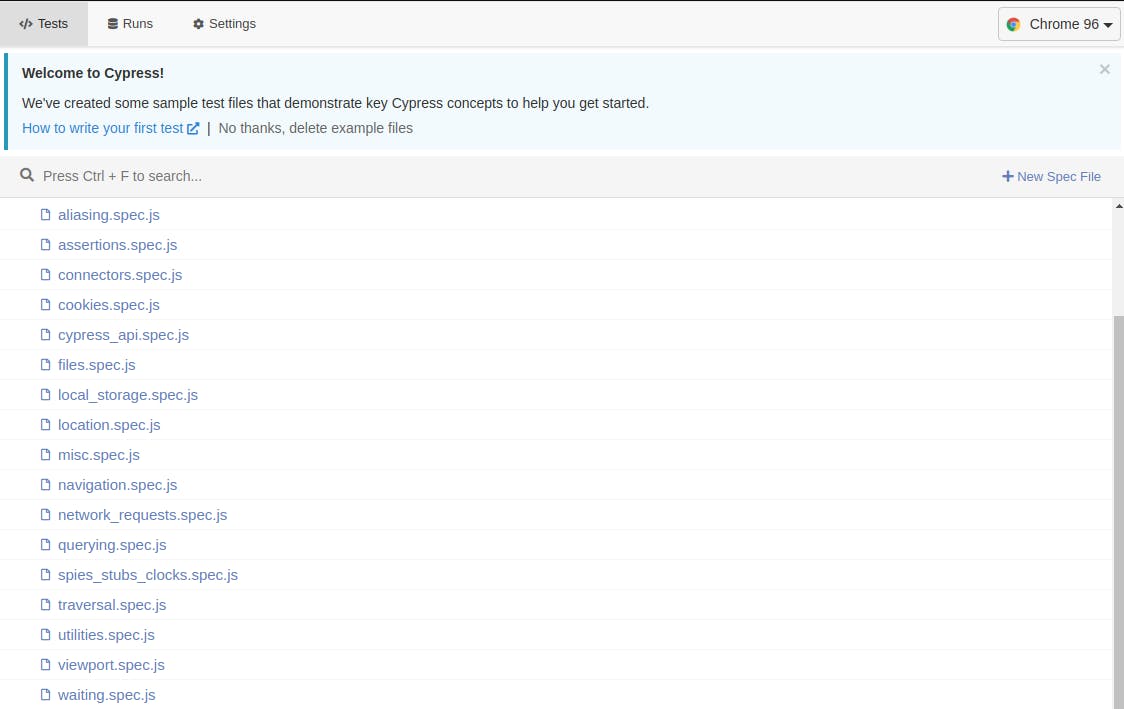 If all went well - congratulations! 🥳
You'll see a bunch of default tests, Cypress team offers us, but for now we don't need any of them, so you can remove everything inside
 integration folder.
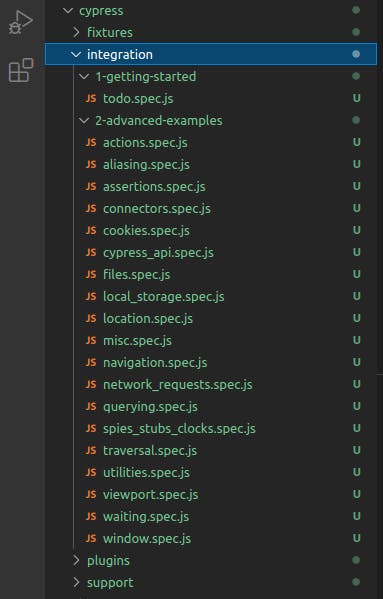
Since it's tiresome to run huge commands every time, let's update our package.json file and add some scripts for opening Cypress. This example app already contains some test scripts, but we will ignore them this time 😁

Now, next time you want to run Cypress just type the following:
npm run cy:open
The basic set-up is completed and it's finally the time to write some tests!
First test 🥳
Hope you didn't get too bored coming long way for your first test, I promise it will get fun from now on.
Create a new file login_spec.js inside cypress/integration folder, we will test if we are able to login 😍 Your file name can be anything you like, but try to keep them easy to understand.
Cypress is using Mocha testing library syntax, so if you have done testing with Mocha before, you'll feel very comfortable with it.
But if you don't - no worries! It's pretty simple and straightforward.
First, let's see if we can visit our example app link.
Open login_spec.js in your IDE and type the following and save:
describe('login', () => {
    it('user can visit website', () => {
        cy.visit('http://localhost:3000/');
    });
});
In your project folder terminal run npm run cy:open. You will see Cypress GUI opens up and you can see all your test specs. Click on the login_spec and see the magic happening. Cypress will open a Chrome (or browser you choose in Cypress GUI) and run your test!
If you have done everything right, you will see your test pass!
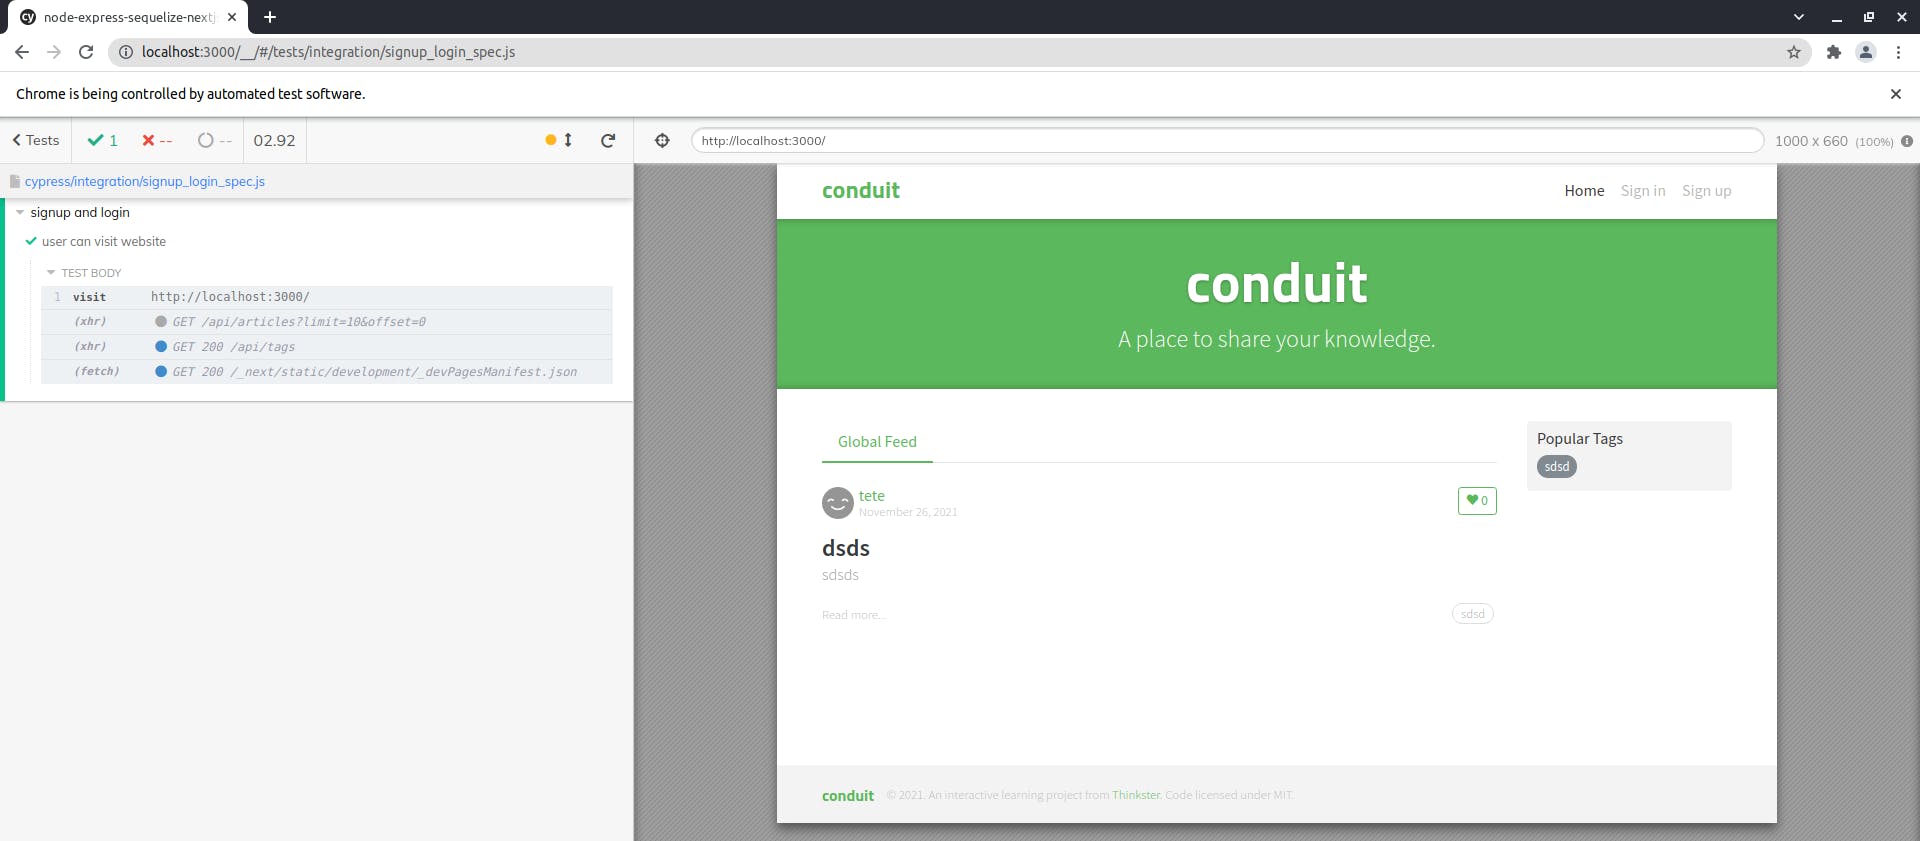
Congratulations 🥳 You have wrote your first test!
If Cypress is unable to visit the link make sure that your app is running, return to prerequisites section and make sure that you started a server.
Take a look down below to see what all those words mean 👇
// describe is the name of the whole test spec
describe('login', () => {
    // it is the single test running within test spec
    // it sets the name of the test
    it('user can visit website', () => {
        // cy.visit is a Cypress API to navigate test browser to the link
        cy.visit('http://localhost:3000/');
    });
});
Phew! That was a bumpy road, but in the end we have done our first test! Now let's make some real thing!
Log In test
Okay, first thing first, we need to plan a test! As a user, once you visited a website, you want to login. Of course in the real apps the whole process is more complicated - with emails, confirmation and stuff, but for a first run this is more than enough.
To not over complicate things for first part, we will create our test user ourselves.
Go to http://localhost:3000/user/register and register a new test user, I'm going to use following data:
username: test
email: test@test.com
password: test
No worries, our example app is not that sophisticated, so it won't stop you from creating fake user data. So hit that Sign Up button and you will be redirected to Home page.
So, the plan!
Log In:
- User visit Log In page
- User type in the fields with their information
- User click Sign In button
- User redirected to Home Page
To test if user has been Signed In we will check that once signing in is completed we can see Your Feed tab.
Back to the code!
Open login_spec.js and let's code the Sign In test.
describe('login', () => {
    it('user can signin', () => {
        //Cypress visits the login page
        cy.visit('http://localhost:3000/user/login');
        // get the Email field and type test user email
        cy.get('input[placeholder="Email"]').type('test@test.com');
        // get the Password field and type test user password
        cy.get('input[placeholder="Password"]').type('test');
        // get the Sign In button and click
        cy.get('button[type="submit"]').click();

        // Cypress waits for page to load and checks if Your Feed contains on page
        cy.contains('Your Feed');
    });
});
Now the interesting part! Save the file, go to your terminal and run npm run cy:open
Select the test and WOW
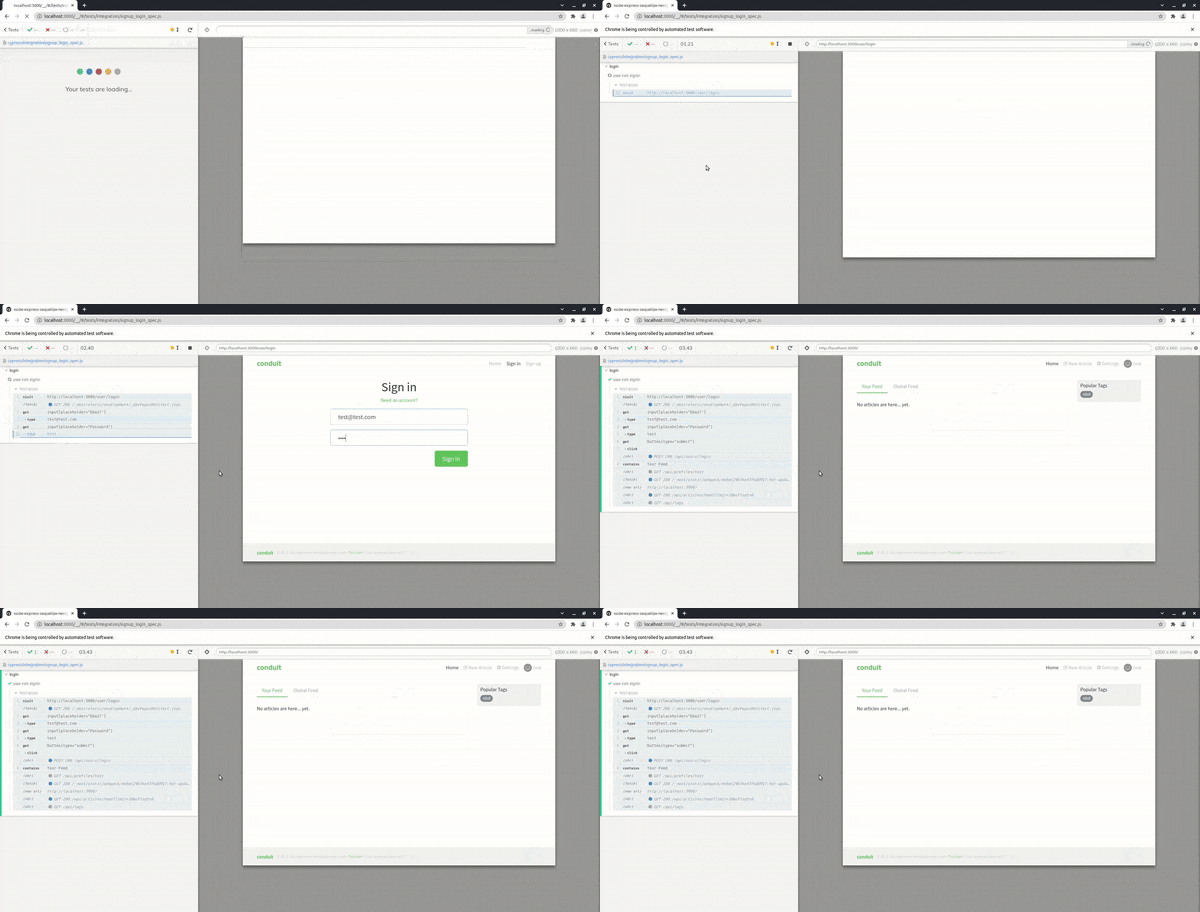

You have made an UI Login End-to-End test! 🥳🥳🥳 That was blazing fast, right?! Yes it was! But don't forget that you are running everything local, so all requests are almost instant, it will be a bit slower in real app, but hey that's what Pros and Cons section was about 😁
Summary
So here are we,with our first E2E test! That was an amazing ride, right? I loved it, to be honest! And I hope you loved it too.
The End-to-End testing is very broad field and possibilities are really huge. We will dive into more functionality Cypress gives us in the next article, and till then you can practice and enjoy this process.
Resources
Bye-bye
Hope you enjoyed the post and it was useful for you! Please leave a feedback and also you can catch me on my Twitter @SergiiKirianov
See you next time 👋

