

Build Your First Online Shop with Vue Storefront and Magento 2
Online shop in less than 30 minutes? Easy.

Developer Advocate, OSS contributor, JavaScript Messiah
Building something like an online shop is a tedious task. It requires a ton of work and experience, especially if we are talking of a Headless Commerce application. Too many things to think of, and too many integrations to connect - in short, it's a very demanding thing to do. But. What if I tell you that you can actually set up a fully functioning shop in less than...30 minutes and for FREE?! 😱
Follow this article and in no time, you will build your first Headless Commerce application 🤗
Prerequisites
Honestly, this is most probably the longest thing you need to do in this tutorial 😅
First of all, we need to make sure that we have Node.js v16 installed. You can check it in a few different ways:
node -v
# v16.17.1 - your Node should be of any subversion of v16
If your Node is lower or higher than 16, please use nvm command to use Node 16 if you don't have nvm please follow the installation guide on their GitHub page
nvm use 16

# in case this doesn't work, the nvm version manager will tell you what to do next, specifically
# N/A: version "16 -> N/A" is not yet installed.

# You need to run "nvm install 16" to install it before using it.
After the installation is complete, run the use command once again and confirm that you are running Node v16.
If you don't have one already, please install Docker Desktop we will use it to host our Magento store instance on a local machine.
To use the Magento store you need to create an account here - don't close this tab, as we will need it later to create API keys
While Magento is open-source software, it was acquired by Adobe and requires an Adobe account to work with it 🥲
Once you have completed the steps above, we can start creating our store!
Creating Magento store
In your projects folder create a new one called server or backend and cd in there:
mkdir server
cd server
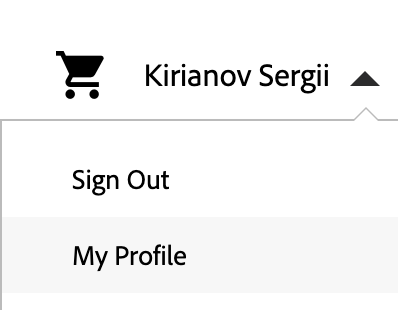
We will use the name server for the sake of this article. Now, in your Adobe account, that you have created before, go to My Profile as shown in the image below:
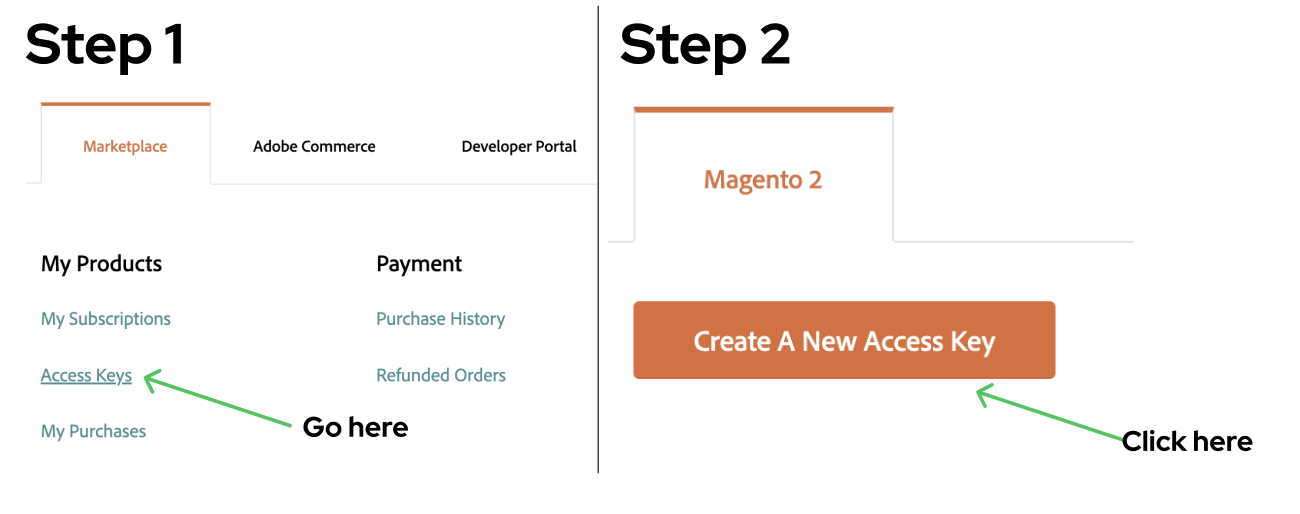
On the new page, you will see a link to the Access Keys page, go there and click Create A New Access Key as shown in the image below:
You will get a set of API keys:
Public Key: *****************
Private Key: *****************
These keys will be used later to set up your store, they will serve as a Login and Password for your future Magento store. Keep them somewhere safe for now 🔐
Finally, we are done with it, let's get to the ✨developer's part✨
In this article, we will be using Docker Magento configuration, because it makes our life SO MUCH EASIER, trust me. Of course, if you are a Magento Pro, you can go with the configuration of your choice ☺️
curl -s https://raw.githubusercontent.com/markshust/docker-magento/master/lib/onelinesetup | bash -s -- magento.test 2.4.4
Run this command to fetch the latest release, build an image and run it locally - it will take a few minutes to complete, so go grab a cup of coffee or tea ☕️
Once the configuration is completed, we just need to do a few more steps. In the server folder (your current folder if you didn't change anything meanwhile) run the following command to create a new Auth file:
cp src/auth.json.sample src/auth.json
Open this file in the IDE of your choice and change the Public and Private keys to those you have created in Adobe panel:
"http-basic": {
    "repo.magento.com": {
        "username": "a1c69cb…",
        "password": "af041560…"
    }
}
Finally, copy this file to the running Docker container - run this command:
bin/copytocontainer auth.json
Vue Storefront uses GraphQL for communication with Magento, so we need to install the necessary modules in our Magento instance. To install them, please run the following commands in your terminal:
bin/composer require caravelx/module-graphql-config
bin/magento module:enable Caravel_GraphQlConfig
bin/magento setup:upgrade
bin/magento setup:di:compile
bin/magento setup:static-content:deploy -f
Now, to the fun part! Your Magento store is already running! You can go to the default URL https://magento.test/ and check it out. Your first online store, but! We will make it way better very soon!
We need to increase GraphQL complexity and depth settings, due to security concerns it's set too small numbers that do not allow us to do deep queries. In order to do so, I would suggest first disabling Two-Factor Authentication from our Admin panel, we don't need that protection for learning purposes 🙈
To disable it, run the following commands in your terminal:
bin/magento module:disable Magento_TwoFactorAuth
bin/magento cache:flush
Once the flush is completed, we can add our first Admin user 🙌
Run the next command in your terminal and you will be prompted to enter new Admin user details:
bin/magento admin:user:create
You're done! Now you have your first Admin user. Go to https://magento.test/admin and enter the username and password you have entered before for the Admin user.
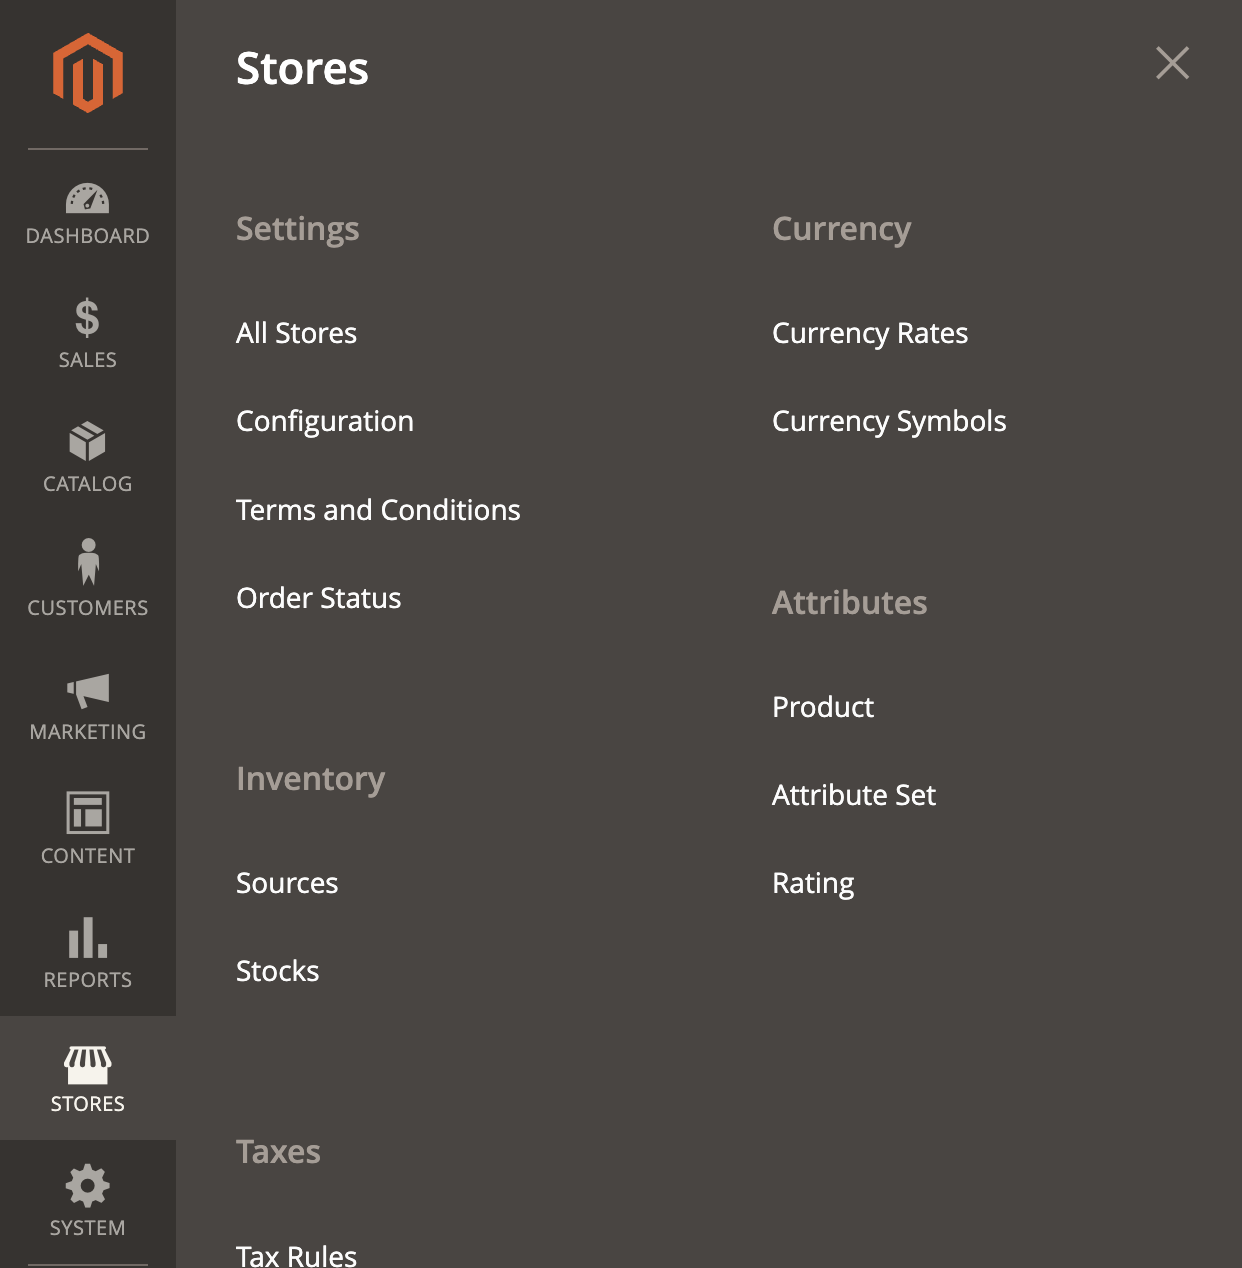
In your Admin panel, hover over Stores and click on Configuration.
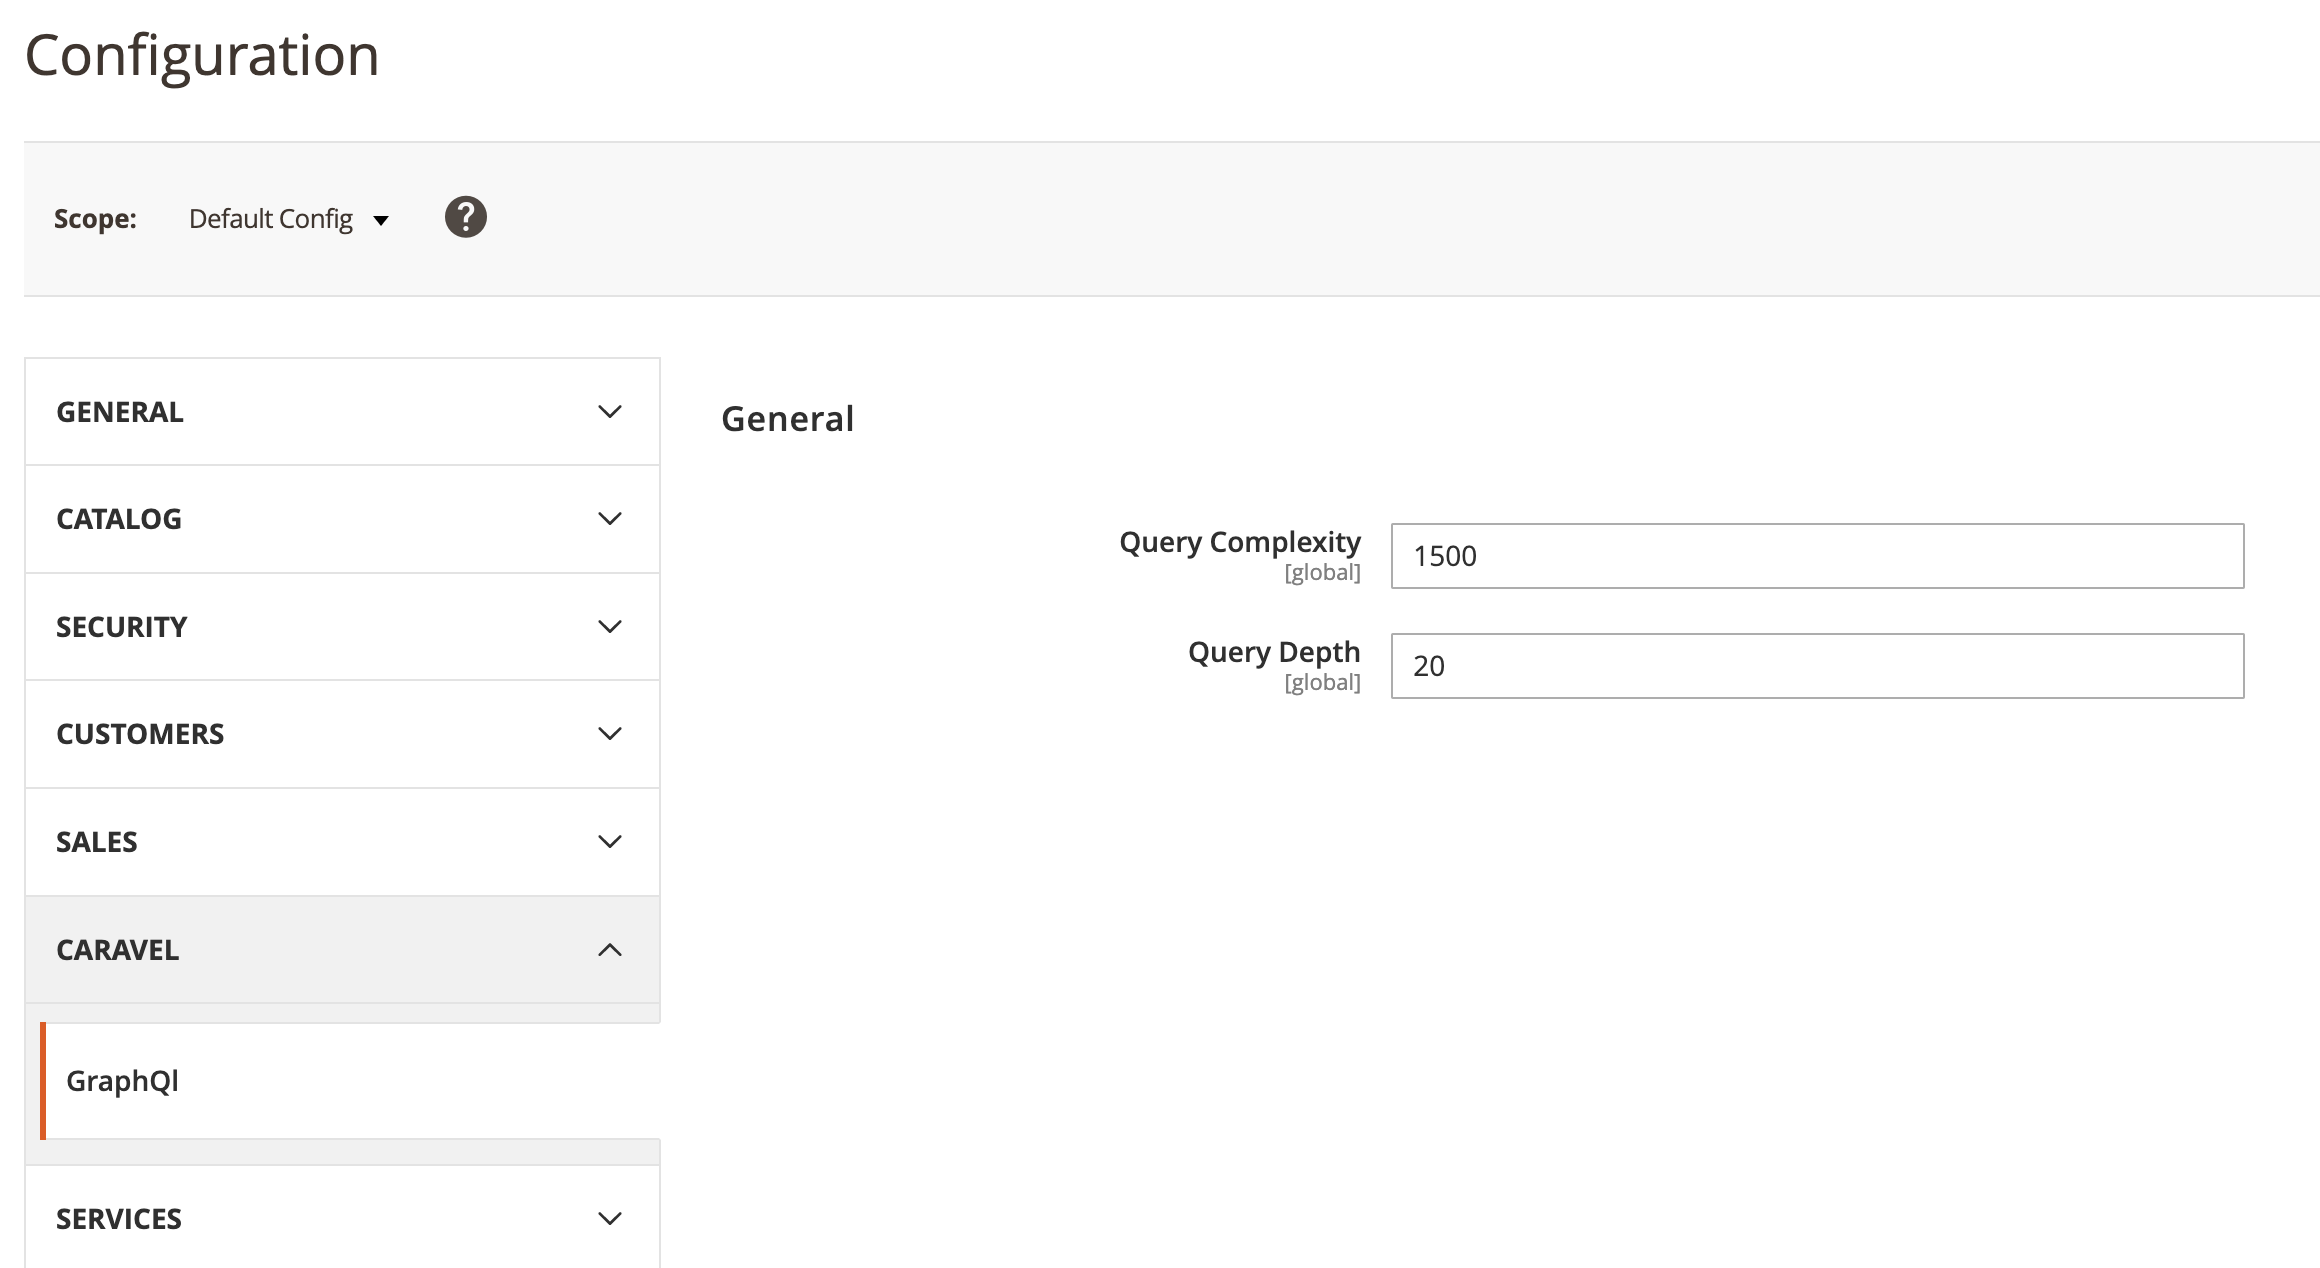
On the Configuration page go to CARAVEL / GraphQL and change the settings as shown below:
Phew, are you with me? We have completed the hardest parts of setting up the Magento store. Now, we need to populate it with sample data and upgrade our configuration. Run the next two commands in your terminal:
bin/magento sampledata:deploy
And
bin/magento setup:upgrade
Congratulations! Finally, your Magento store is completely set up! 🥳🥳🥳
Why do we need Vue Storefront?
As you can see we already have a complete and fully functioning store. So, why do we need anything else? Well, you see, Magento 2 is an awesome open-source eCommerce platform, but it is built as a monolith, meaning that every large change you have to make on the Frontend will lead to a lot of disruption on the Backend too. What we want is to use the Magento instance as a Headless eCommerce platform for our fully custom Frontend. If you are wondering what is Headless eCommerce, you can check my blog post here.
Vue Storefront is an open-source ecosystem of developer tools that allow you to build on top of existing eCommerce platforms like Magento, commercetools, and more. You can find the whole list of integrations here. But for now, we will focus on Magento integration since it's open-source and completely free to use.
Setting up Vue Storefront
I promise this would be WAY faster than what we did previously 😅
First of all, let's go back to our project folder:
cd ..

# Right now you should be in the parent folder and server folder should be a child folder. To ensure that you are in the right folder, run

ls

# You should see your server folder in the list
Once you are here, let's install Vue Storefront, by running next command:
npx @vue-storefront/cli generate store
Since you don't have Vue Storefront CLI installed, it will ask you if you want to install it, press Y and wait till the installation is complete. During the installation, it will prompt you to select the integration of your choice and you, of course, will select Magento 2 😏
Once installed, go to the generated folder, in the case of this article I called the folder store and run yarn to install all required dependencies:
cd store
yarn
Now, we only need to set up the configuration file. Run the following command to create .env file:
cp .env.example .env
Open your .env in the IDE and fill out the necessary information:
VSF_NUXT_APP_ENV=development
VSF_NUXT_APP_PORT=3000
VSF_NUXT_APP_HOST=localhost

VSF_STORE_URL=http://localhost:3000 <- change to http
VSF_MIDDLEWARE_URL=http://localhost:3000/api/ <- change to http
VSF_SSR_MIDDLEWARE_URL=http://localhost:3000/api/ <- change to http

VSF_MAGENTO_BASE_URL=https://magento.test <- change to this
VSF_MAGENTO_GRAPHQL_URL=https://magento.test/graphql <- change to this

VSF_MAGENTO_EXTERNAL_CHECKOUT_ENABLED=false
VSF_MAGENTO_EXTERNAL_CHECKOUT_URL=https://magento.test <- change to this
VSF_MAGENTO_EXTERNAL_CHECKOUT_SYNC_PATH=/vue/cart/sync

VSF_IMAGE_PROVIDER=ipx <- change to ipx this will
Save your changes and run:
yarn dev
Visit locahost:3000 and you should see your website up and running! Congratulations, you have created a fully functioning Headless eCommerce website!
Now, you can build your own Frontend completely independent from your Backend, in our case Magento.
If you want to continue building this Frontend application, customizing it, or start completely from scratch, visit Vue Storefront documentation to learn more about the tools that will help you to do that!


