

A Step-by-Step Guide to Deploying Vue Storefront Application on the DigitalOcean App Platform

Developer Advocate, OSS contributor, JavaScript Messiah
Building an application is a complex process, however, this is only half of the work that has to be done. Once the application is built, it must be deployed, so that the world can visit your new online shop. This is a critical step and, in this article, we will focus on the technical aspects of deploying Vue Storefront on DigitalOcean.
This guide is intended for developers who are familiar with both Vue Storefront and DigitalOcean and are looking for a step-by-step guide to setting up the eCommerce application on the cloud-based hosting service. By the end of this article, you will have a fully functioning Vue Storefront instance hosted on DigitalOcean.
So, if you're ready to dive into the world of cloud deployment, grab your favorite text editor and let's get started!
Prerequisites
For this article, we assume that you already have hosted a Magento 2 instance and your Vue Storefront application is fully connected to the Magento 2 platform.
You’ll need:
Account with DigitalOcean
GitHub repository with Vue Storefront application source code
Environment variables for the Vue Storefront application
A bit of patience 🙂
Once you have all of the above, let’s start with creating a DigitalOcean application.
Creating DigitalOcean application
Step 1: Create a DigitalOcean App
To create a DigitalOcean app, go to the sidebar and click "Apps". DigitalOcean's application platform allows you to set up a CI/CD from your source code and redeploy it on every new commit to the branch of your choice. In this article, we will be using GitHub to store our Vue Storefront application.
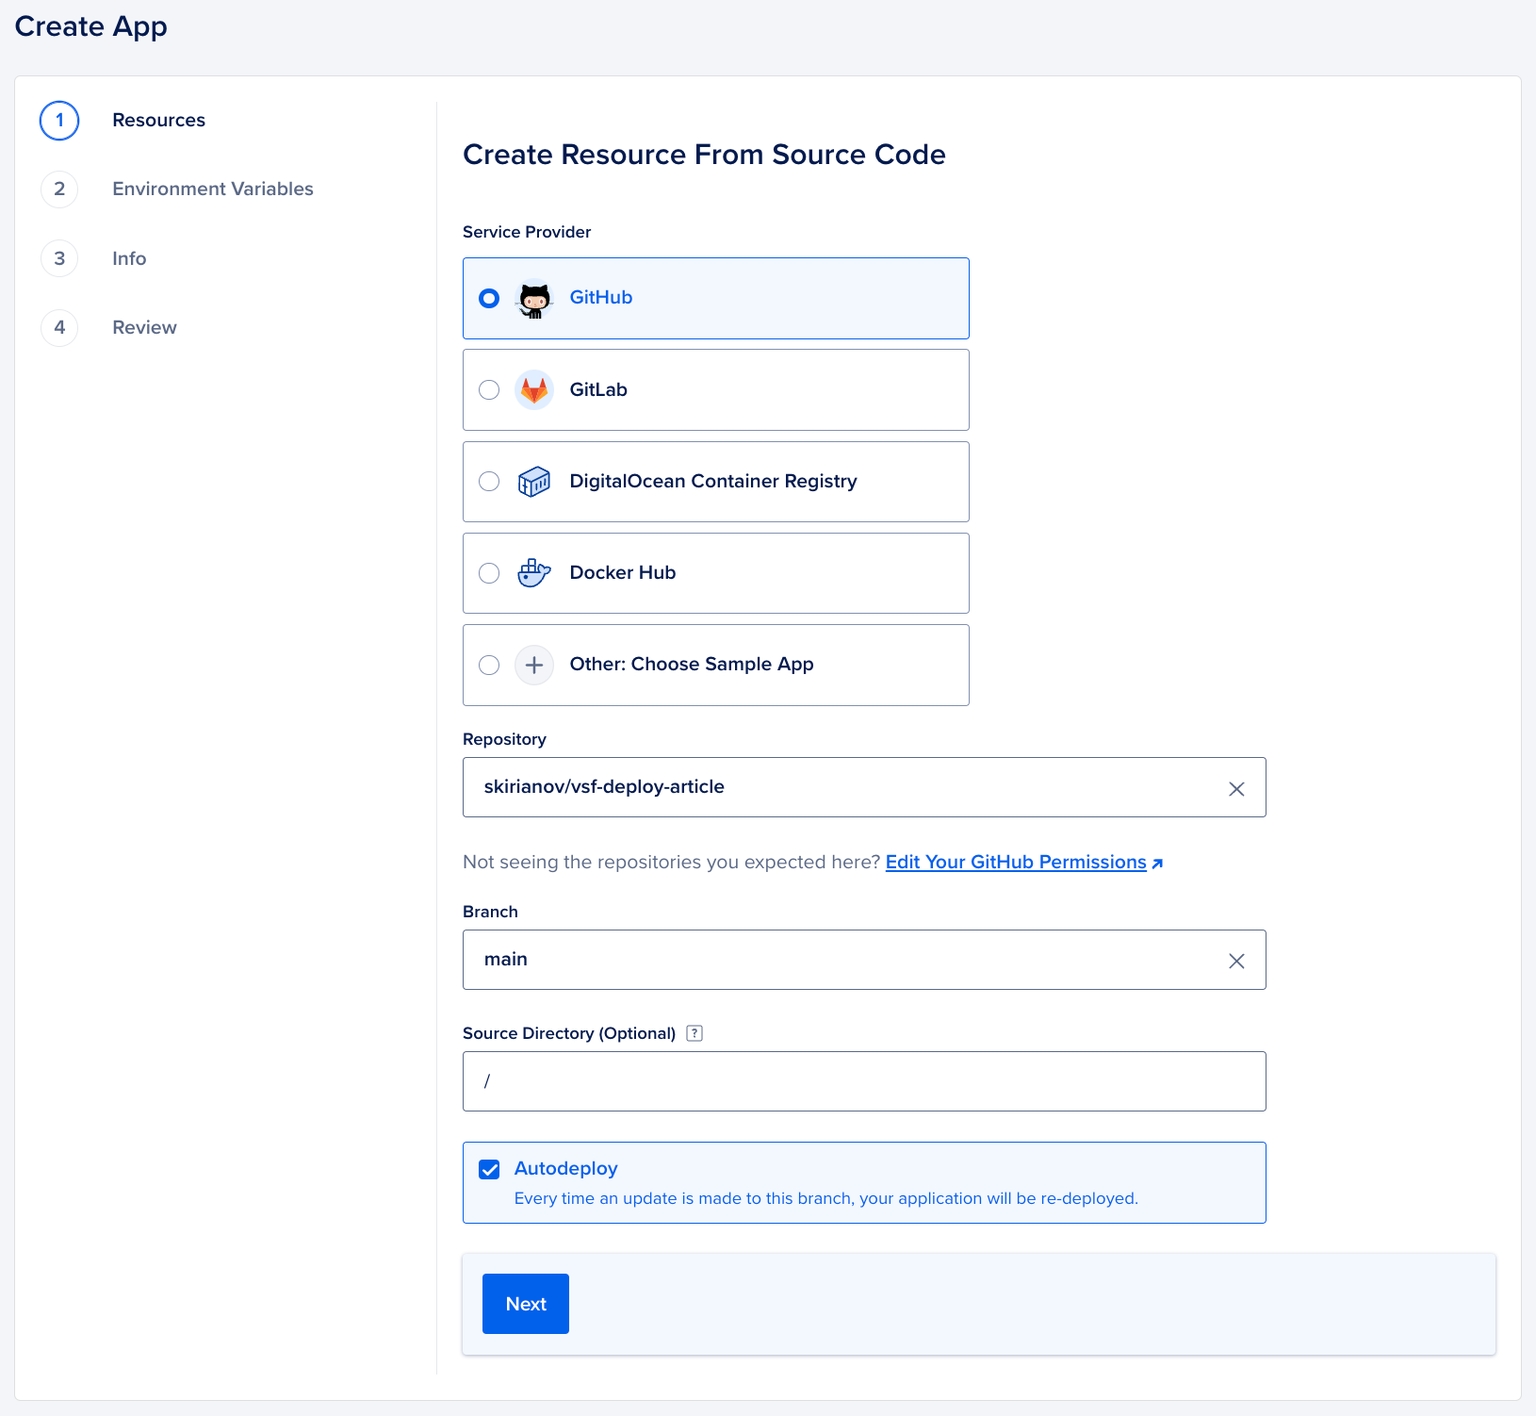
Click on the "Create App" button and let's configure our repository. You will be prompted to choose the service provider, repository, branch, source directory, and “Autodeploy” if needed. We have opted for auto-deploy so that every time our branch updates, it will trigger a redeploy. Click "Next" to continue with the setup.
Step 2: Allocate Resources
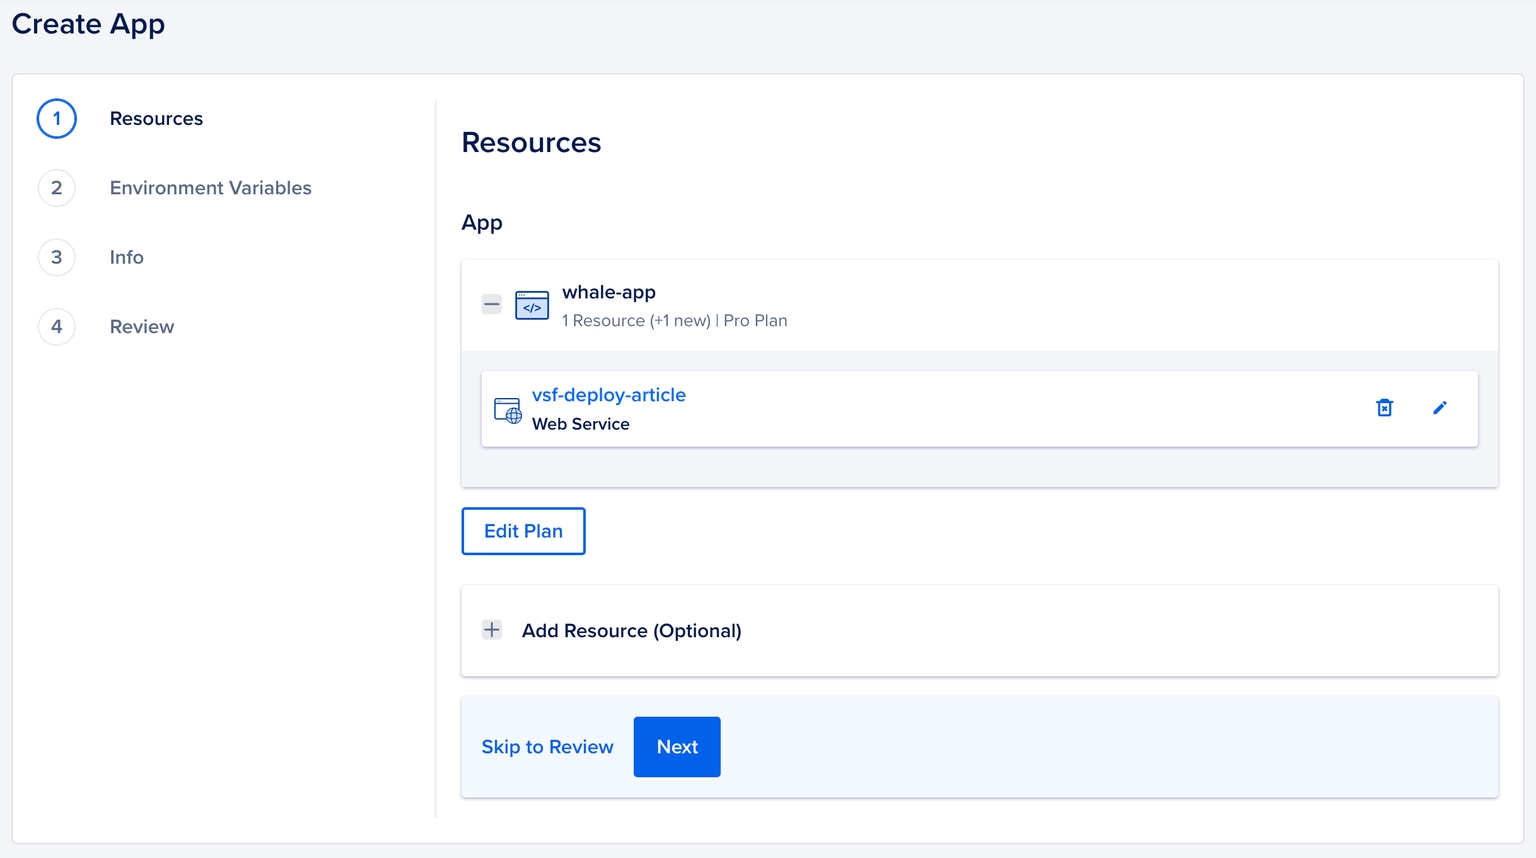
On the Resources page make sure you check the Edit Plan button, you may be charged additionally in case DigitalOcean decided to spin up multiple containers. Set the containers to 1 or anything that is suitable to your needs. Click “Next” to continue.
Step 3. Setup Environment Variables
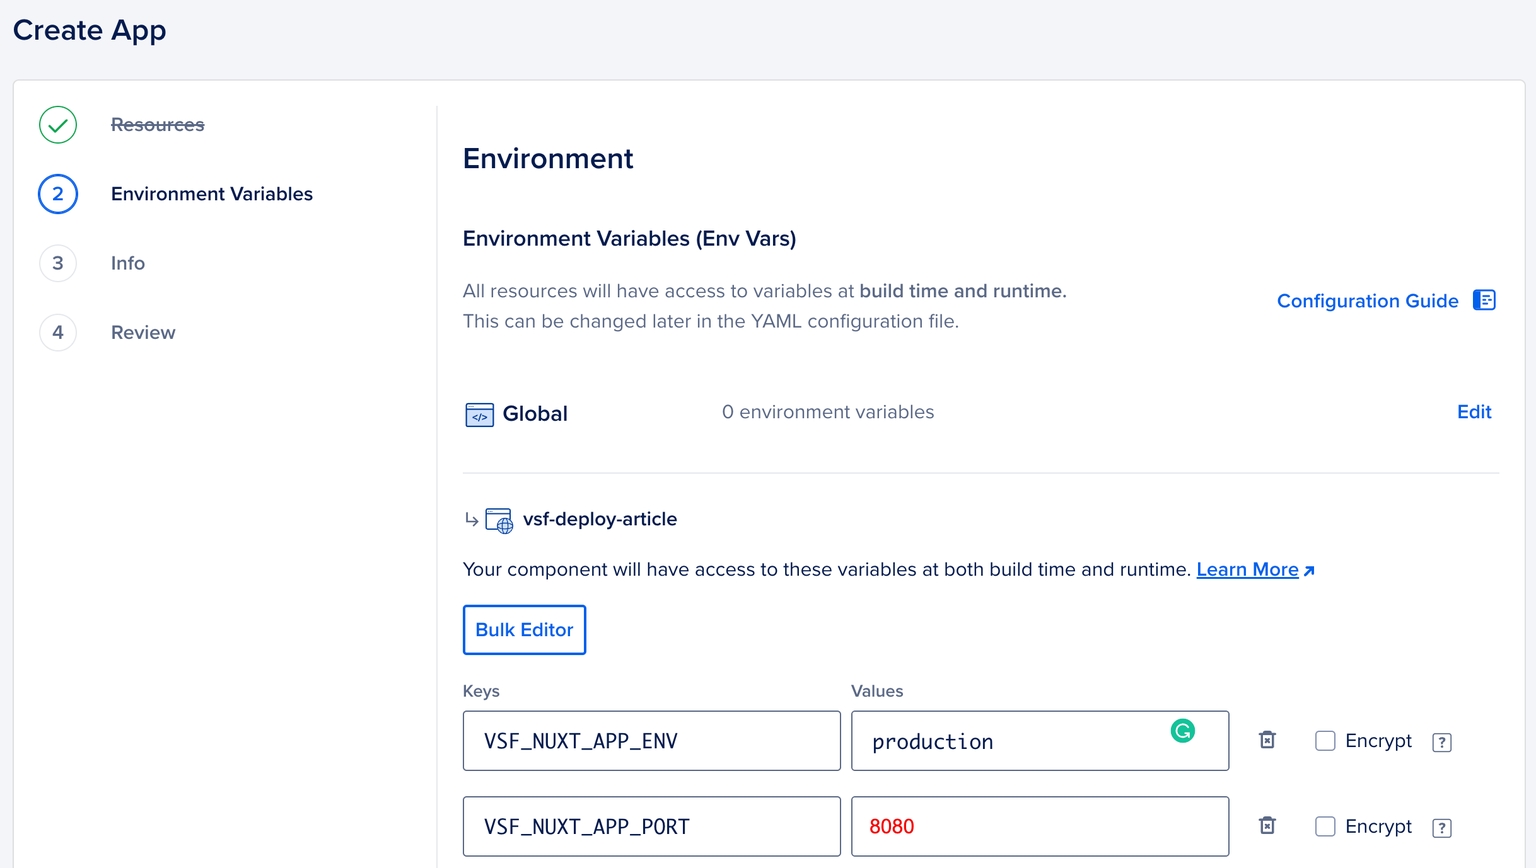
In this step, you can provide the Environment Variables - open the .env file you are using for your locally running application and paste it here - don’t worry, we will be able to change it later on.
IMPORTANT: To deploy successfully on the DigitalOcean App Platform you have to change the values of your environmental variables. Please follow the guide below:
VSF_NUXT_APP_ENV=production
VSF_NUXT_APP_PORT=8080
VSF_NUXT_APP_HOST=0.0.0.0
VSF_STORE_URL=https://0.0.0.0:8080
Step 4. Review the configuration information
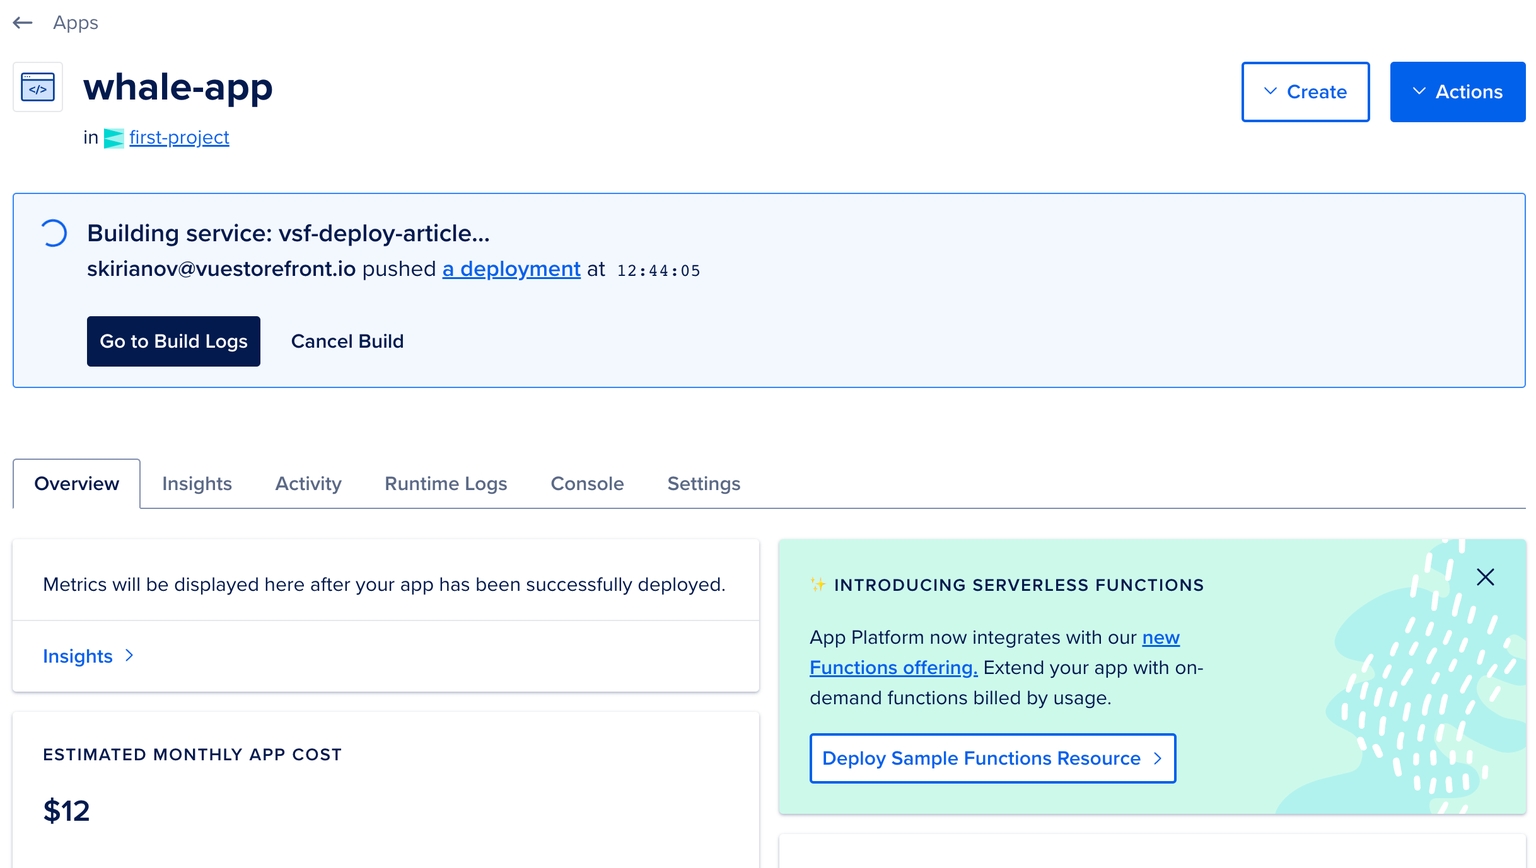
Click through the next steps and review all the information you have provided, when done, click “Create Resources” - you will be redirected to the application dashboard. Let’s wait while our application is building.
When you first build your application, you will get your Live URL, if you visit it you will see an error in your console and network tab, this is because DigitalOcean will try to run API middleware on an HTTP host we can’t access due to the Mixed Content policy. To fix that, we will need to make another adjustment to our Environment Variables.
Configure Environment Variables
In your App Dashboard go to the Setting and click on Components: <<PROJECT_NAME>> - in our case it’s vsf-deploy-article. Find the Environment Variables menu and click Edit.
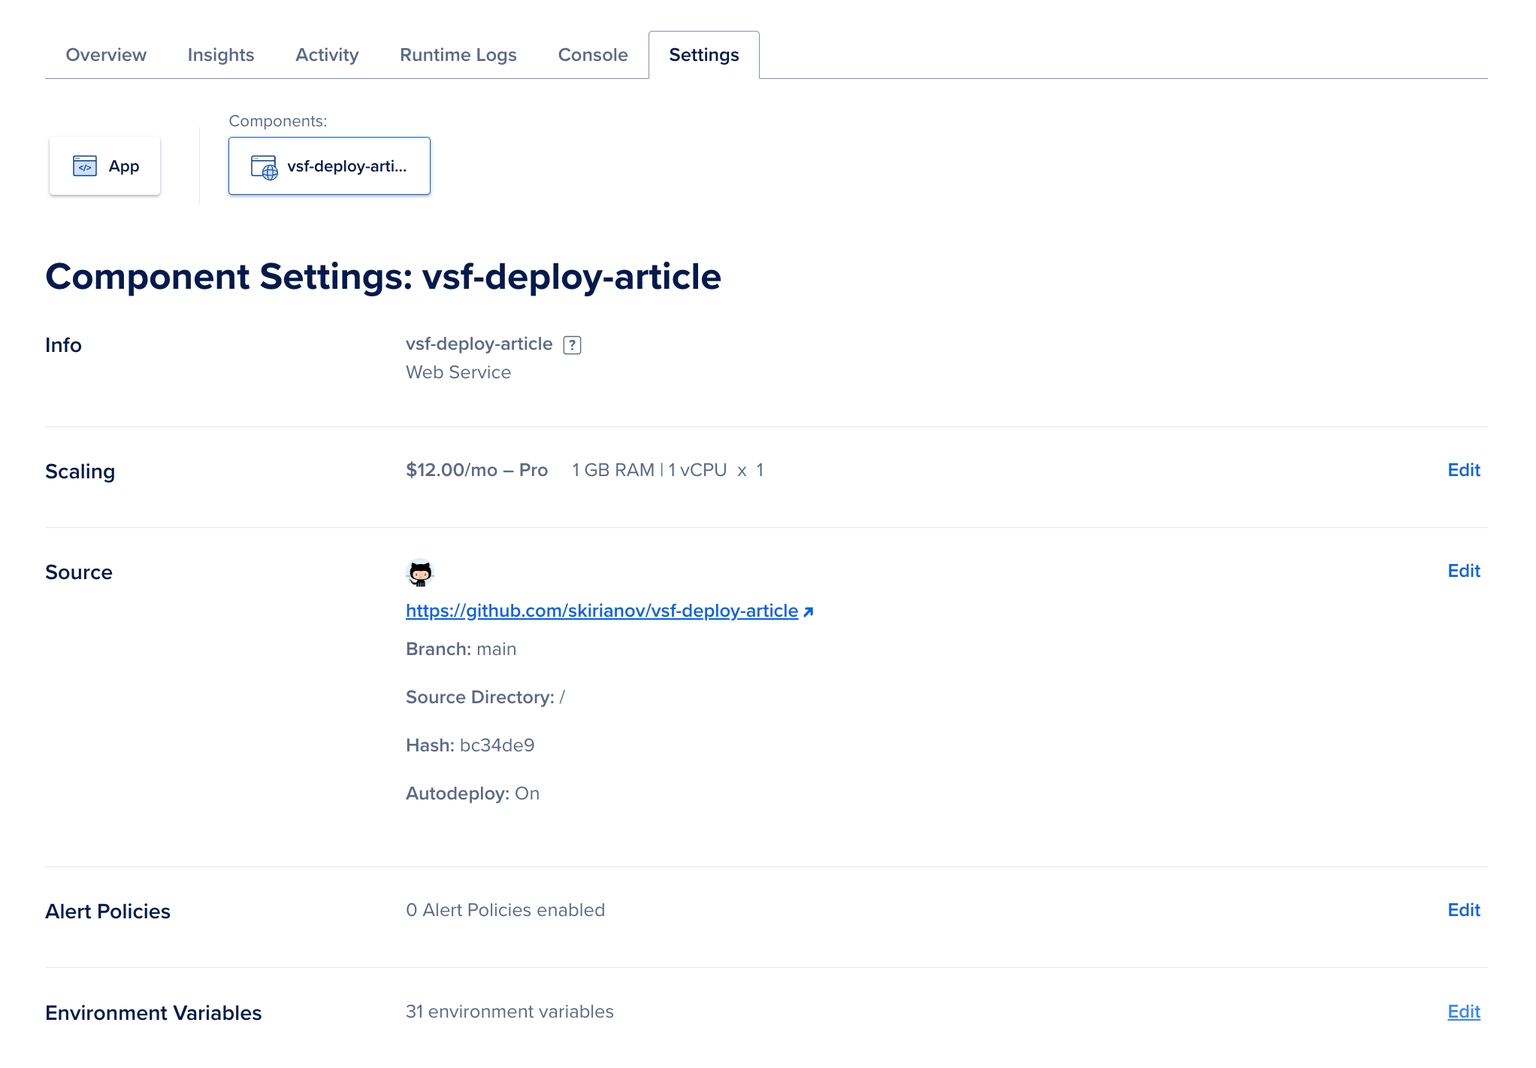
Change the following variables with the URL of your Live website with the API route.
API_BASE_URL -
<<YOUR_APP_LIVE_URL>>/apiAPI_SSR_BASE_URL -
<<YOUR_APP_LIVE_URL>>/api
Save your changes. This will trigger redeployment.
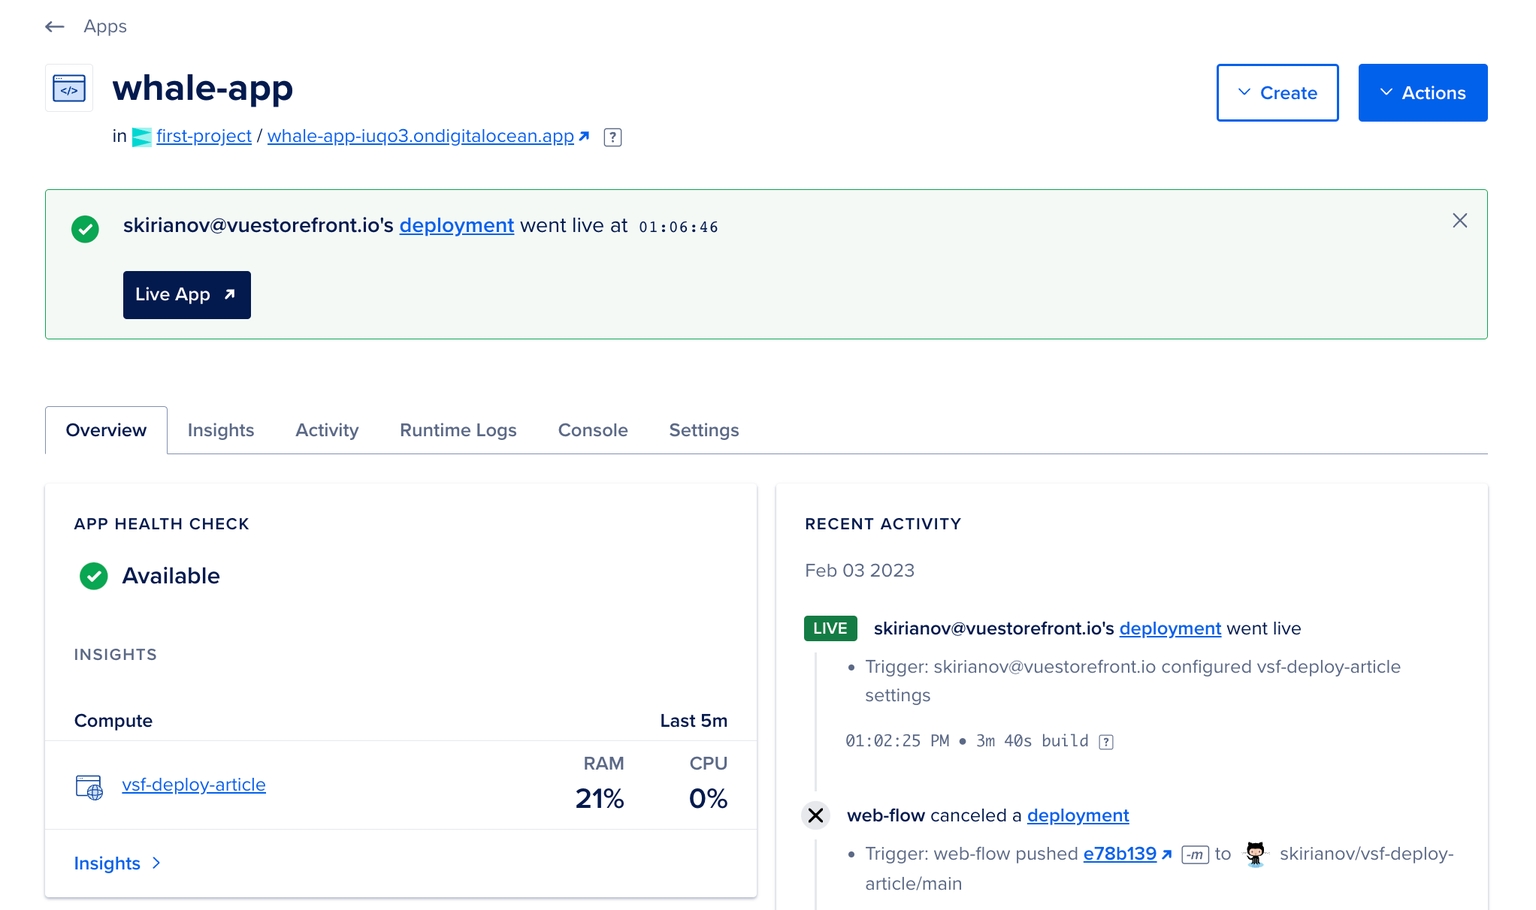
Once the build and deploy step is completed, you will get a notification that everything is OK and healthy. Now you can visit your Live URL. Let’s do that.
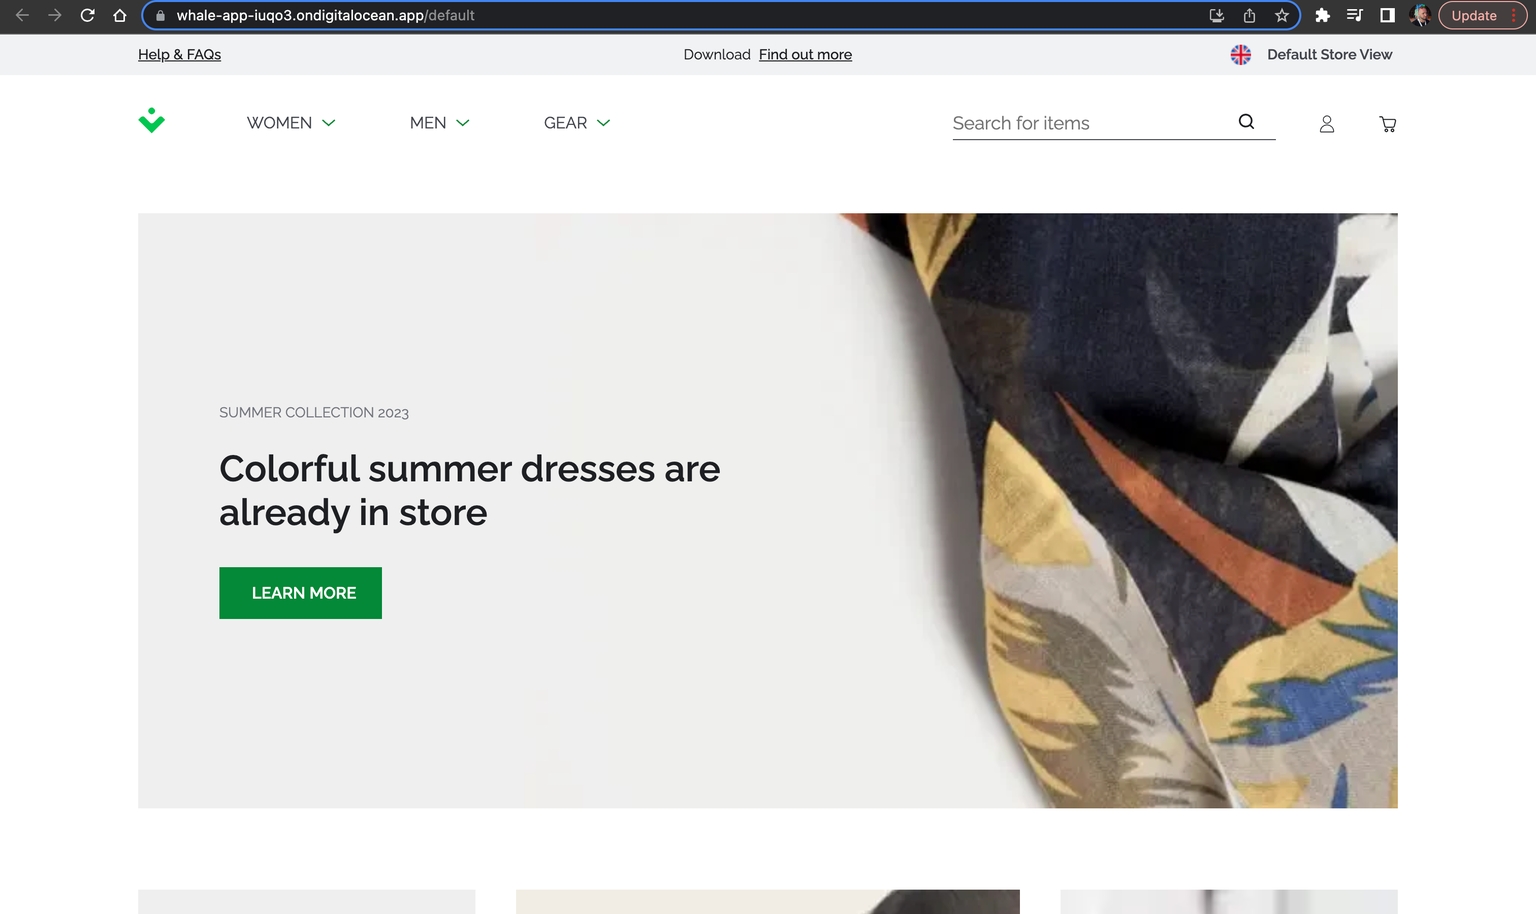
Our Vue Storefront application is up and running! Congratulations! 🥳
Conclusions
It was pretty easy! We have deployed our Vue Storefront application fast and effortlessly thanks to the capabilities of the DigitalOcean App Platform. Now your store is available for everyone in the world! Of course, this is not the end of the journey and you will need to set up a proper domain name too, but this is pretty and you can check it in the DigitalOcean documentation - How to Manage Domains in App Platform.
Even though this method is very simple and straightforward it is not the best solution for a large enterprise application- but, luckily, Vue Storefront has got you covered! Vue Storefront Cloud provides the solution for Enterprise clients to cover all your hosting needs (also reach out to me if you’d like an introduction to the right person to guide you with that).
Feel free to contact us on our Discord server for any matter if you have questions about manual deployment with Ubuntu droplet or other Vue Storefront-related questions.


