

Learn how to create a beautiful CLI application with the oclif and @clack/prompts


I'm in love with CLIs. I never thought I would say that, but developing CLIs is super fun, especially if you use the right tools for the job. In this article, I would like to spread some love about the tools that I use and teach you how to build CLIs yourself! Buckle up and let's start the journey!
Why CLIs are awesome
As with any software, CLIs are built to either help you to achieve something, simplify the process or automate stuff for you. The beauty of CLI is that they are small, fast, and usually more ascetic, meaning they hide a lot from the user while doing tons of complex operations under the hood. Of course, you can build simple CLI apps with Python or JavaScript in a matter of minutes and even simple Node.js "Hello, World" app is considered a CLI program too. But, you can also create very complex applications: connected to the API, that will create or modify existing files, or even build complete apps. CLIs are awesome and today I will try to show you why.
What we will build?
Most probably you have used CLIs before. Maybe it was Astro CLI (btw Houston is amazing) or maybe Vite CLI and of course, if you ever wrote a single line of React you have heard of create-react-app - that is also a CLI program.
Today, I would like to build something similar. We will create a CLI application that will do the following:
generate a starter React project (we will use the same React template from Vite)
select if the user wants to use JavaScript or TypeScript
select if the user wants to install the Tailwind package, and
install necessary dependencies
We have a lot of work to do, so let's not waste any more time and start a new CLI project.
Start a new CLI project
Let's first start with a very basic CLI project and just confirm that everything is running as we expect it. I will be using oclif - a framework to build CLI applications with JavaScript or TypeScript.
Initial setup
Open your terminal and run this command:
npx oclif generate new-react-cli
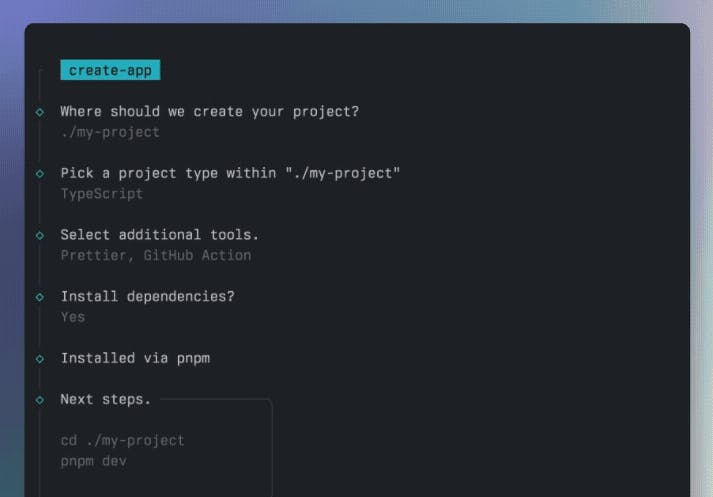
oclif will prompt you some questions and start generating a project, in my case this is what I've got.
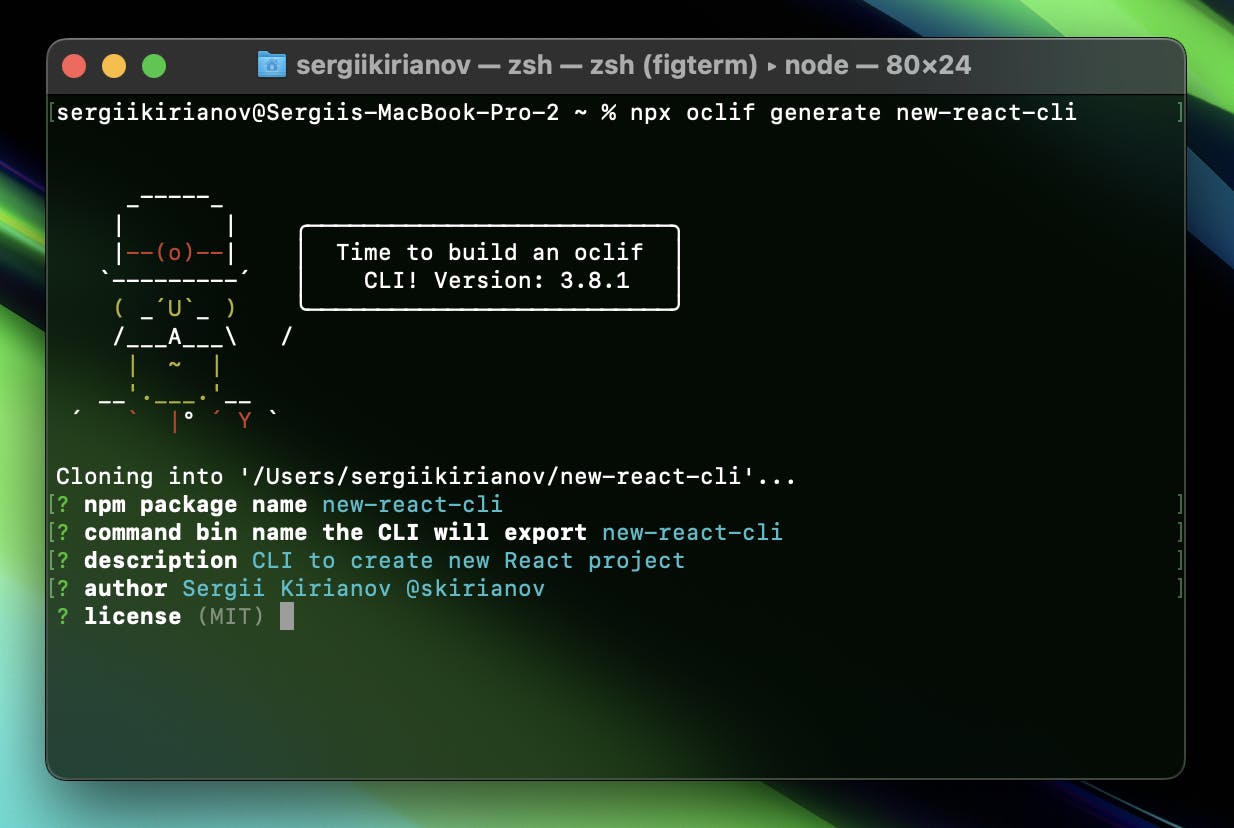
Once you entered all the necessary information and oclif completed the creation we can open our new CLI application in the IDE of your choice. I am using VS Code :)
Btw, I guess you have noticed already that oclif itself is a CLI application :D
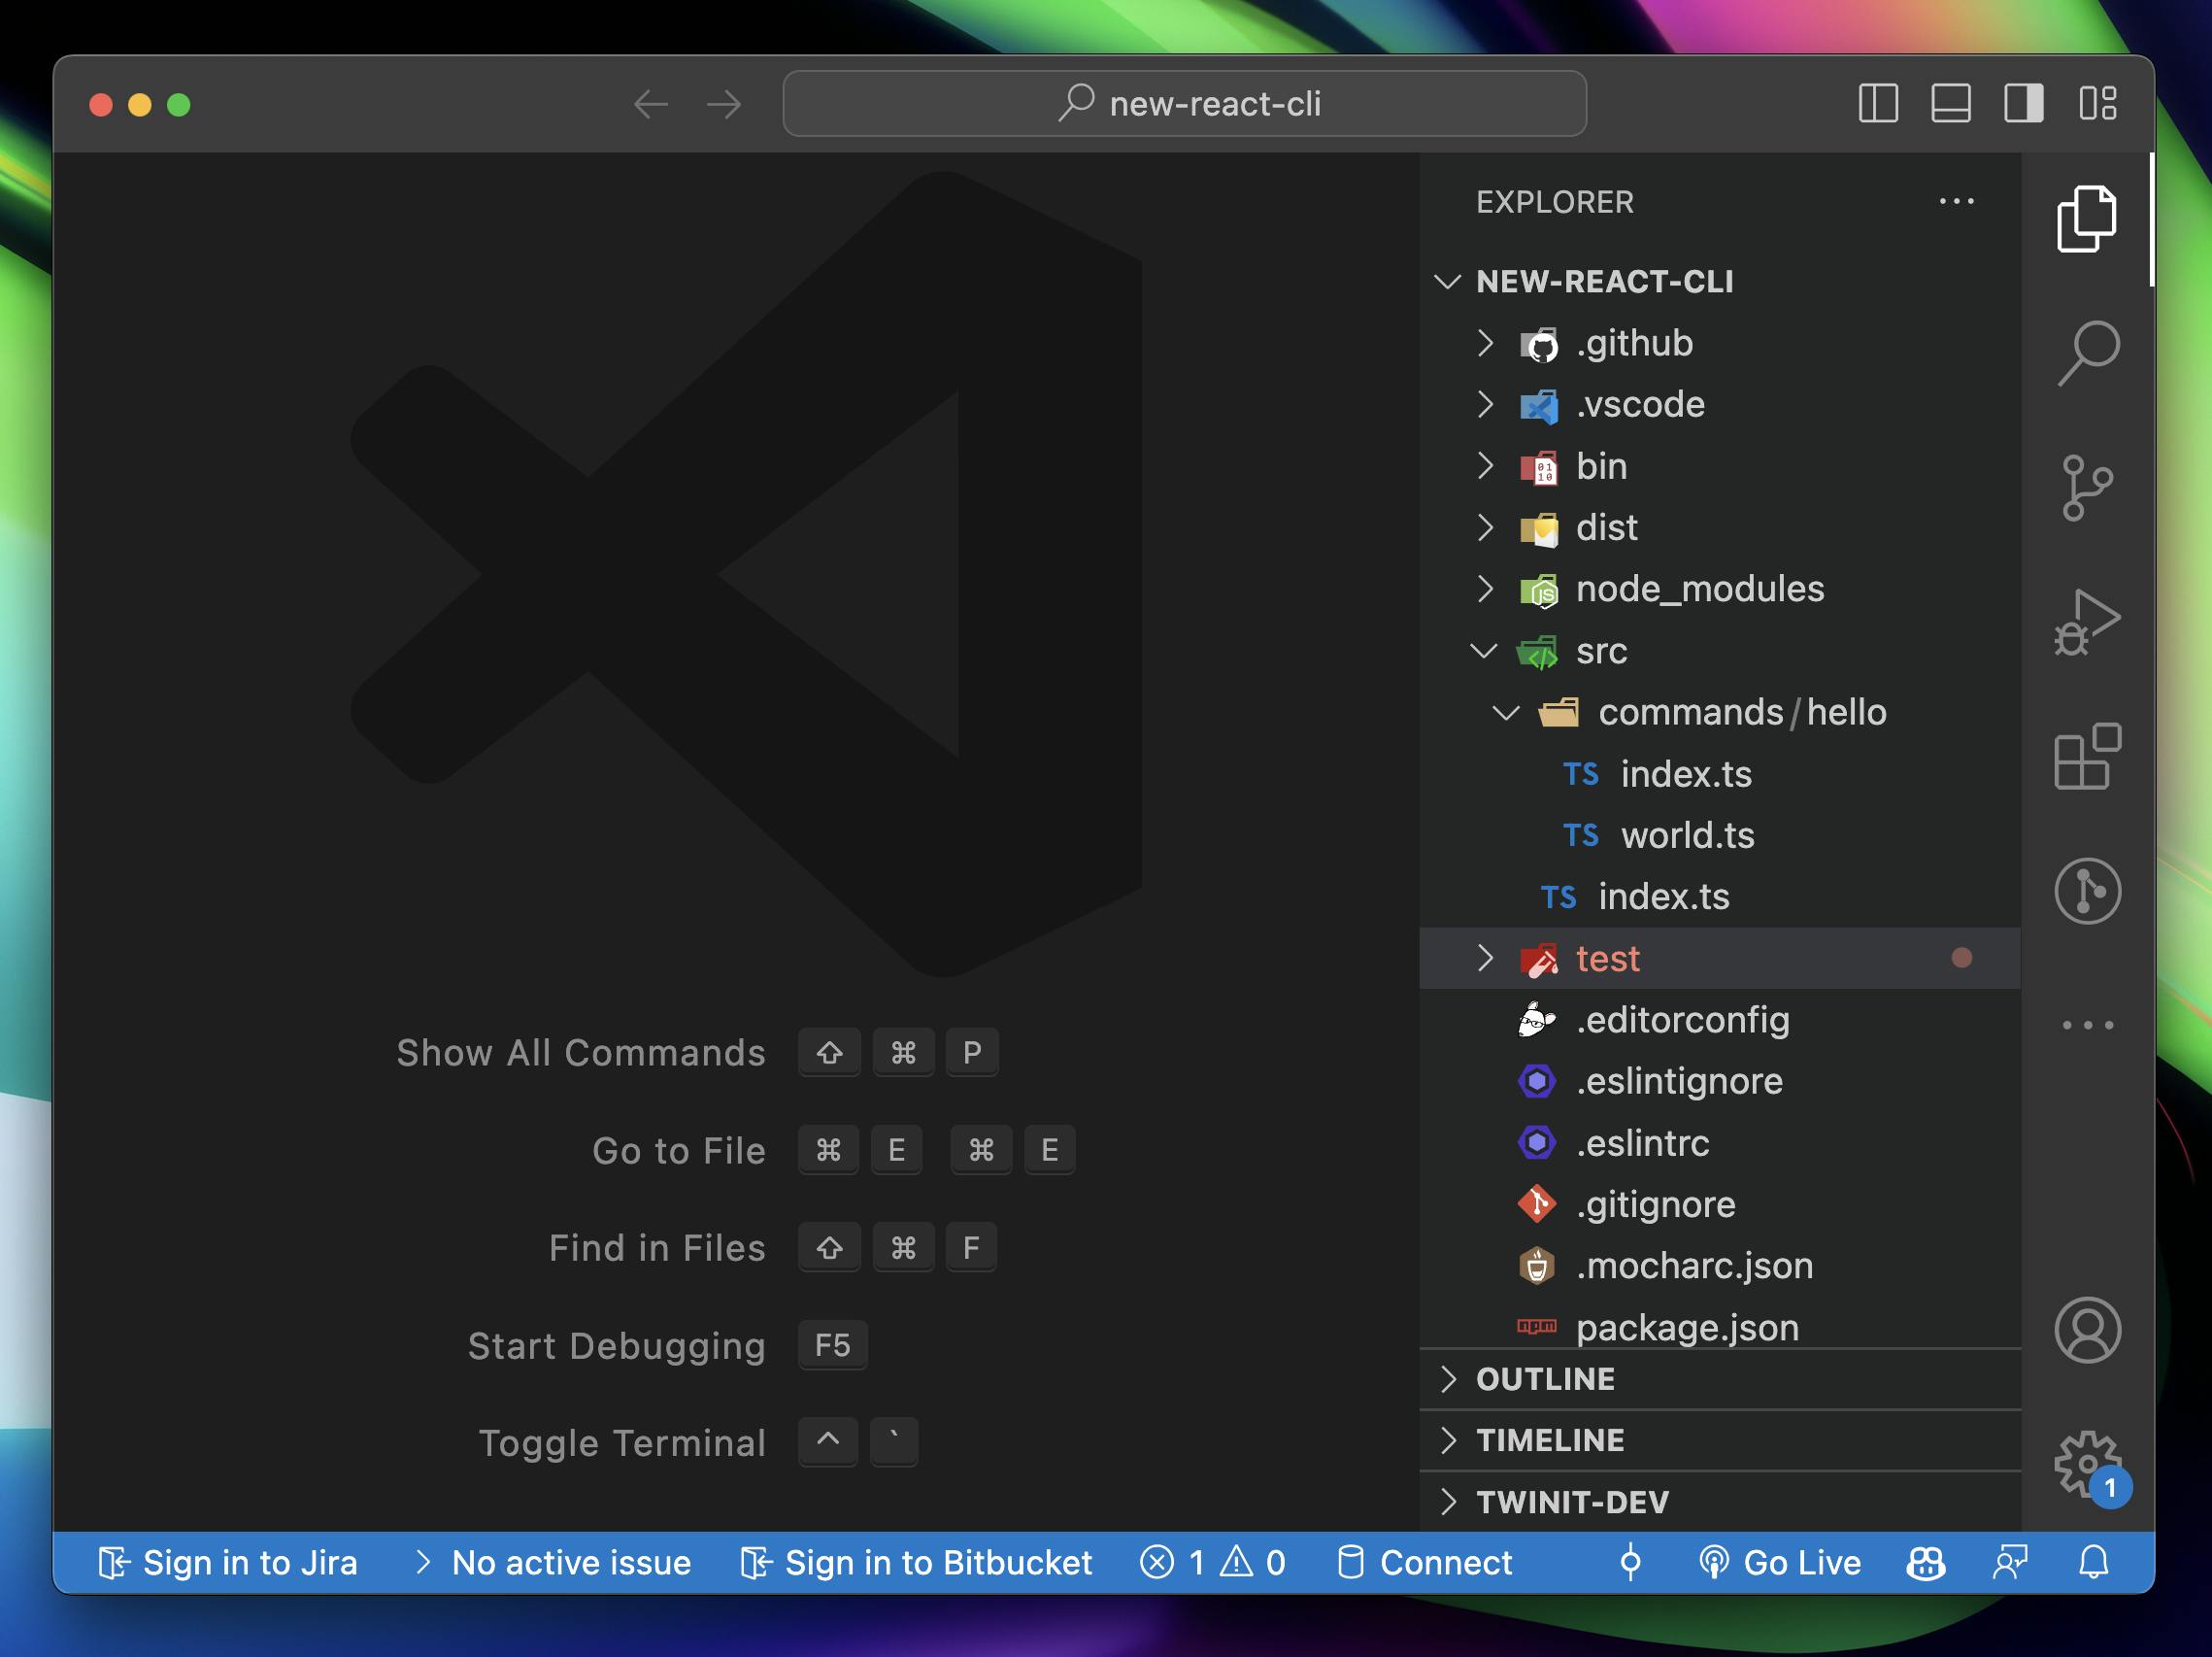
Project structure
First, let's understand the project structure and location of the files. We will skip testing of CLIs in this article and will only focus on the developing part. The most important folder for us here is src/commands - this is where all commands are located. oclif is working in such a way that the name of the command in the CLI is the same as the name of the file under the commands folder.
Take a look at the folder structure below:
Before we dive deep into the code, let's build our CLI and try to run it. Open the integrated IDE terminal and run the build command.
I have selected to use yarn package manager, so my command will be
yarn build. In case you selected npm - usenpm run buildcommand.
Once the build is completed, run the CLI with the following command:
./bin/run hello sergii -f world
CLI will print out "hello sergii from world! (./src/commands/hello/index.ts)" into the console.
Learning how commands work
Let's break the command we ran into smaller pieces and inspect it:
./bin/run- simply we use the run script from the bin folder in order to initialize the CLIhello- the name of the command. Note thathellois also used as a folder name inside thecommandsfolder. We will talk more about it a bit latersergii- an argument that we pass tohellocommand-f world- a flag that we pass tohellocommand
Okay, okay, what argument, what flag?! Sure, let's inspect commands/hello/index.ts file:
import {Args, Command, Flags} from '@oclif/core'

export default class Hello extends Command {
  static description = 'Say hello'

  static examples = [
    `$ oex hello friend --from oclif
hello friend from oclif! (./src/commands/hello/index.ts)
`,
  ]

  static flags = {
    from: Flags.string({char: 'f', description: 'Who is saying hello', required: true}),
  }

  static args = {
    person: Args.string({description: 'Person to say hello to', required: true}),
  }

  async run(): Promise<void> {
    const {args, flags} = await this.parse(Hello)

    this.log(`hello ${args.person} from ${flags.from}! (./src/commands/hello/index.ts)`)
  }
}
As you can see in the code our Hello class is extending built-in Command class - this makes Hello a command itself. Now, let's go through each line of code and understand it:
descriptionandexampleare used by oclif to create a--helpprintout that explains how to use the command, in case it was not documented or the user just forgot it.flags- flags are non-positional special arguments that may or may not receive a followed argument. Flags can be eitherstring- expect an argument after the flag orboolean- do not expect the following argument. Since flags are non-positional it means that they can be entered anywhere after the command itself.args- args or arguments are positional arguments, which means that the order of arguments matters. In case you have more than one argument, make sure that when you call a command you pass arguments in the correct order, e.g.arg1 arg2 arg3.argscan be required and optional.async run()- a main function that will be called when the command is initiated
As you can see, everything is pretty straightforward. Let's get back to our folder structure.
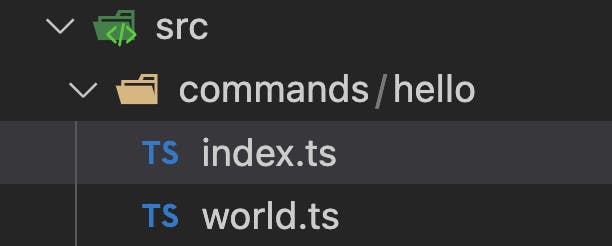
All files under the commands folder are legit CLI commands. Though, there's no file called hello.ts in order to call the hello command, this is because oclif treats folders as commands too. In this case, index.ts is the entry file to hello command. But, what world.ts is doing? The world command cannot be called by itself, but since it's under the hello folder you can call it like so:
./bin/run hello world
And since this is treated as a separate command, it will not receive any args or flags that the hello command expects, it's a totally different and standalone command.
I, personally, do not prefer to keep multiple commands under the same folder name, until it's 100% necessary in order to prevent user from receiving an error.
In this article we will use one file - one command approach.
Creating our own command
Let's get rid of the boilerplate commands that oclif has generated and finally start building our own CLI app - delete hello folder.
oclif comes with multiple commands to help you build a new CLI application. One of such command is:
oclif generate command NAME
This will create a new command file name NAME
Let's run it and create new command - create-react.

oclif has created a new boilerplate file create-react.ts and a test file. Finally time for coding 😉
We will start low and keep on building more and more features along the article. First, we will print out "This is the creacreate-react command" to the terminal to test that everything works fine.
Do not forget to run the build command before you try to run the CLI
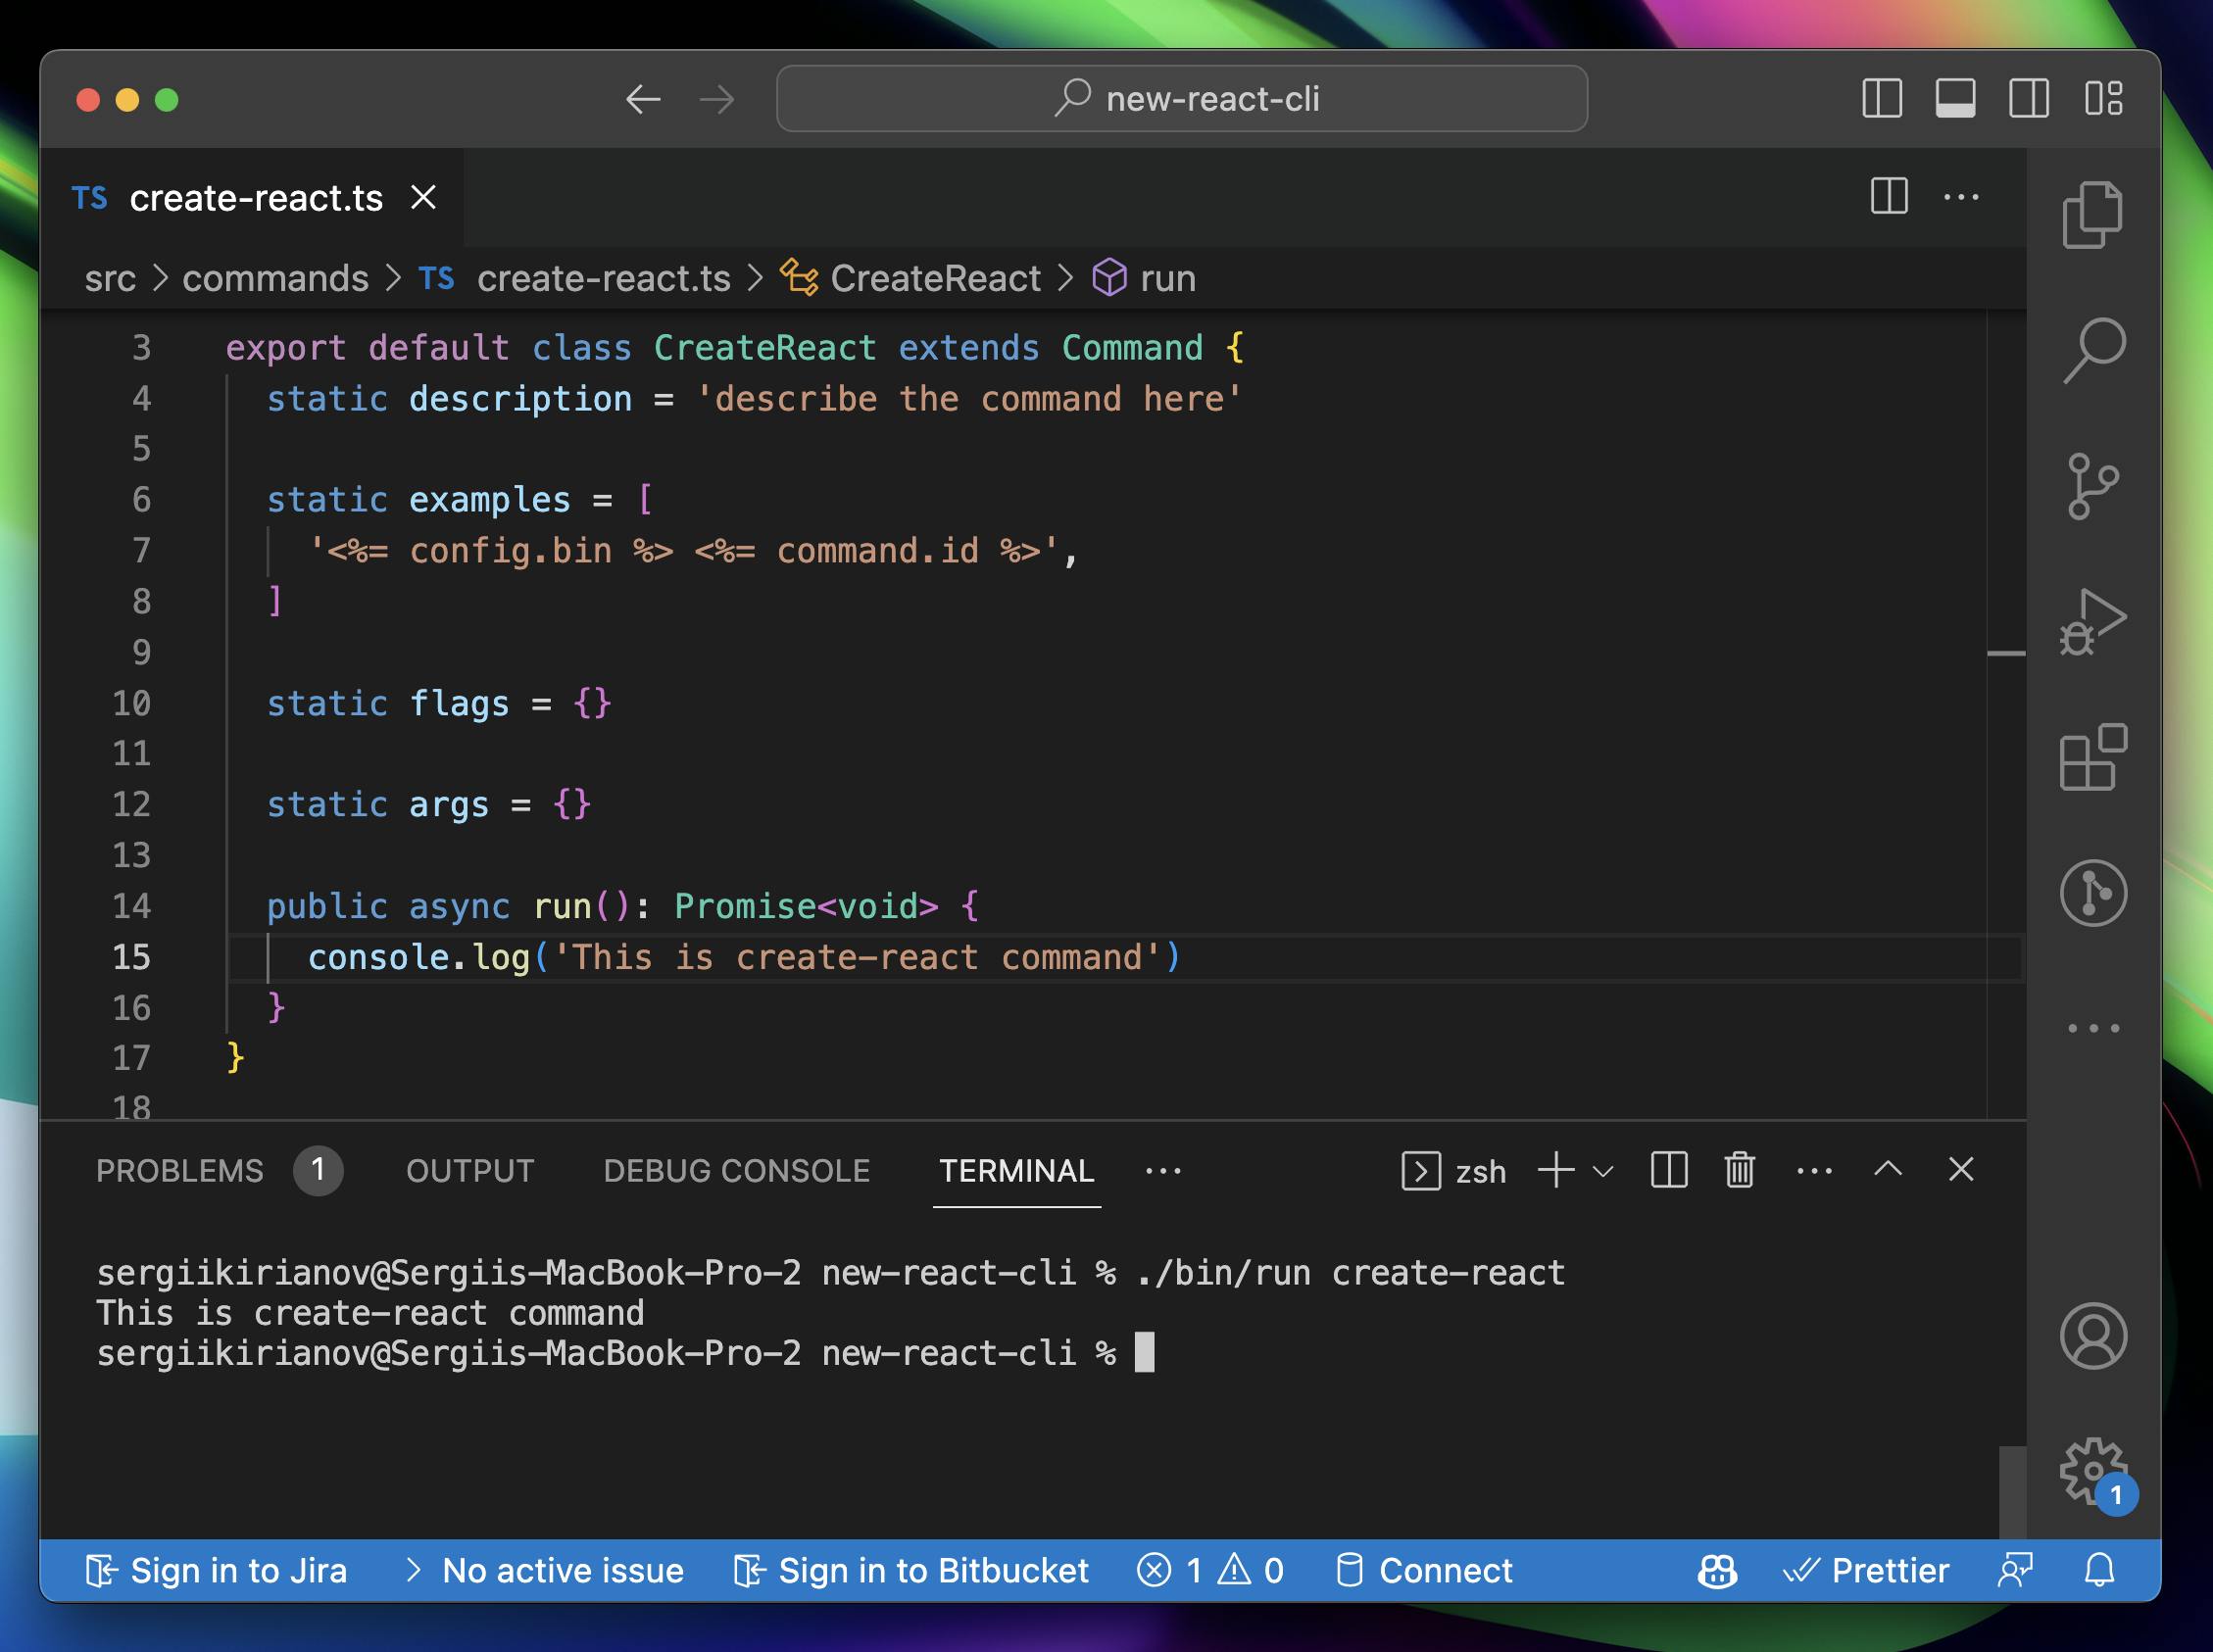
It works, awesome!
I have removed all the arguments and flags since we don't need them at this point. Since we have learned a lot about oclif and CLIs already, let's start creating our own CLI app.
create-react CLI application overview
As we mentioned earlier, first of all, we need to generate a new React project. Don't panic! Most of the CLIs are not actually generating every single file. Usually, there's a template project ready to be cloned from GitHub. And this is exactly what I did for this project :)
You can find templates in these repos:
React TypeScript - https://github.com/skirianov/vite-react-ts-template
Okay, so what's the plan? How we will generate the project?
Let's break down the whole app logic into a few smaller steps:
Greet users when they start the CLI
Ask users what will be the name of the new app directory
Check if such a directory exists and if users want to override it
Ask users what template they want to use
Clone the selected template from the respective GitHub repository
Print out the success message after the process is completed
And here we go!
Start using @clack/prompts
There are many different libraries to enhance your CLI building experience. I, personally, like @clack/prompts by amazing Nate Moore - it's an open-source library for creating sweet and beautiful CLI applications.
The project is pretty young and is still under development
I bet you know how to install libraries with npm, so I will skip this step if you don't mind, you can find all the info in the GitHub repo link I provided above.
Let's start by greeting and prompting the user.
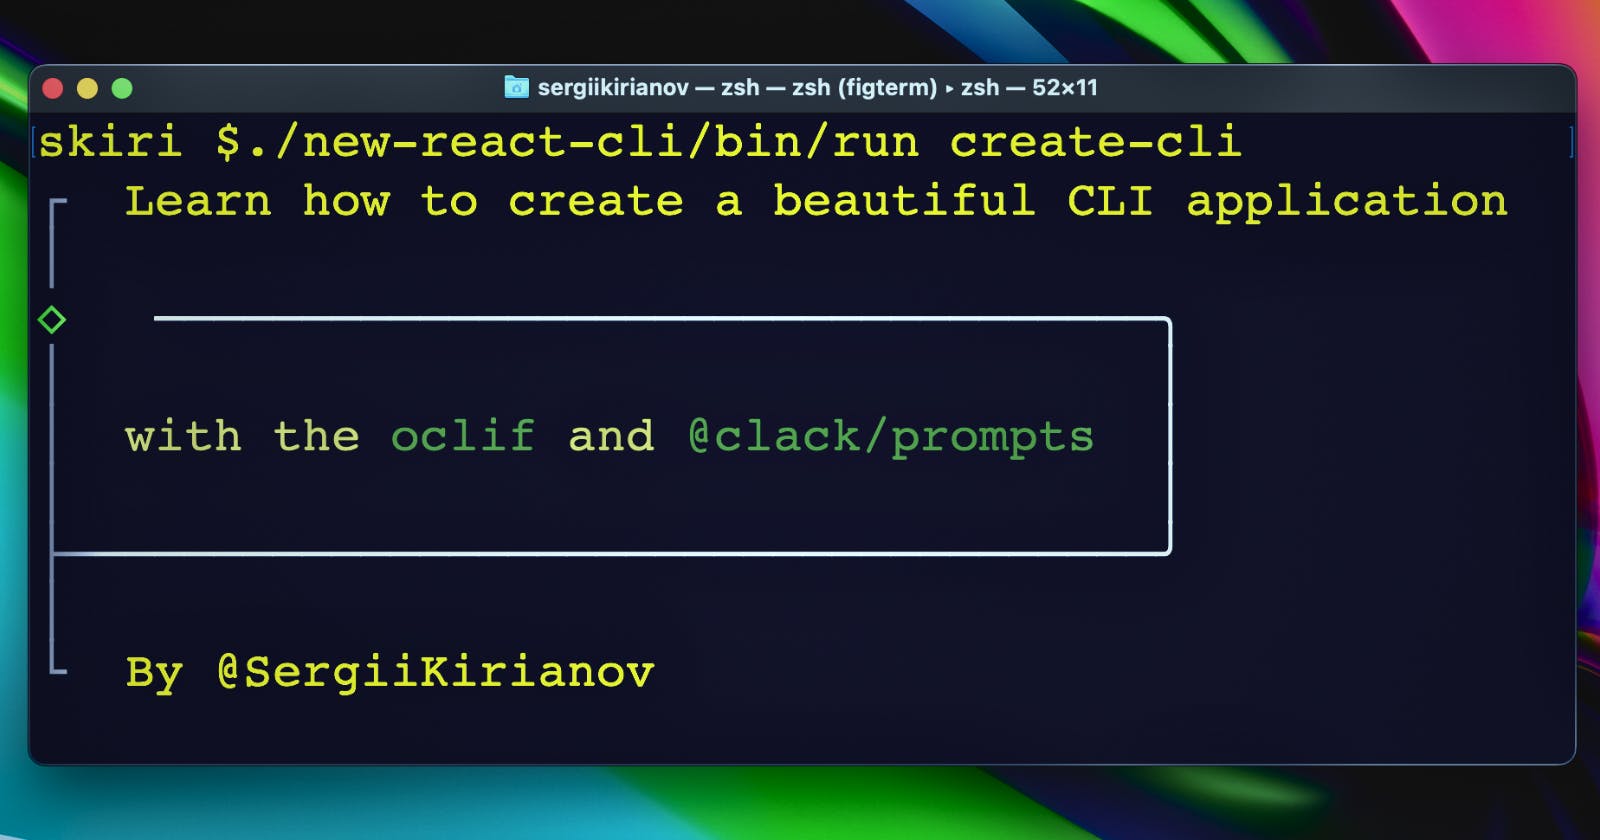
@clack/prompts requires you to follow a bit of structure, specifically, since the UI matters for us. Take a look at the example CLI app from @clack docs:
You can see that these tiny lines on the left side of the printouts are all connected, so in order not to break them, we need to follow some structure. Luckily, it's pretty simple:
Intro
Spinners/prompts
Outro
Let's start with the intro - import intro method from @clack/prompts package and add it to your run function.
import { intro } from '@clack/prompts';

// inside run() function
intro('Welcome to create-react CLI! 🚀');
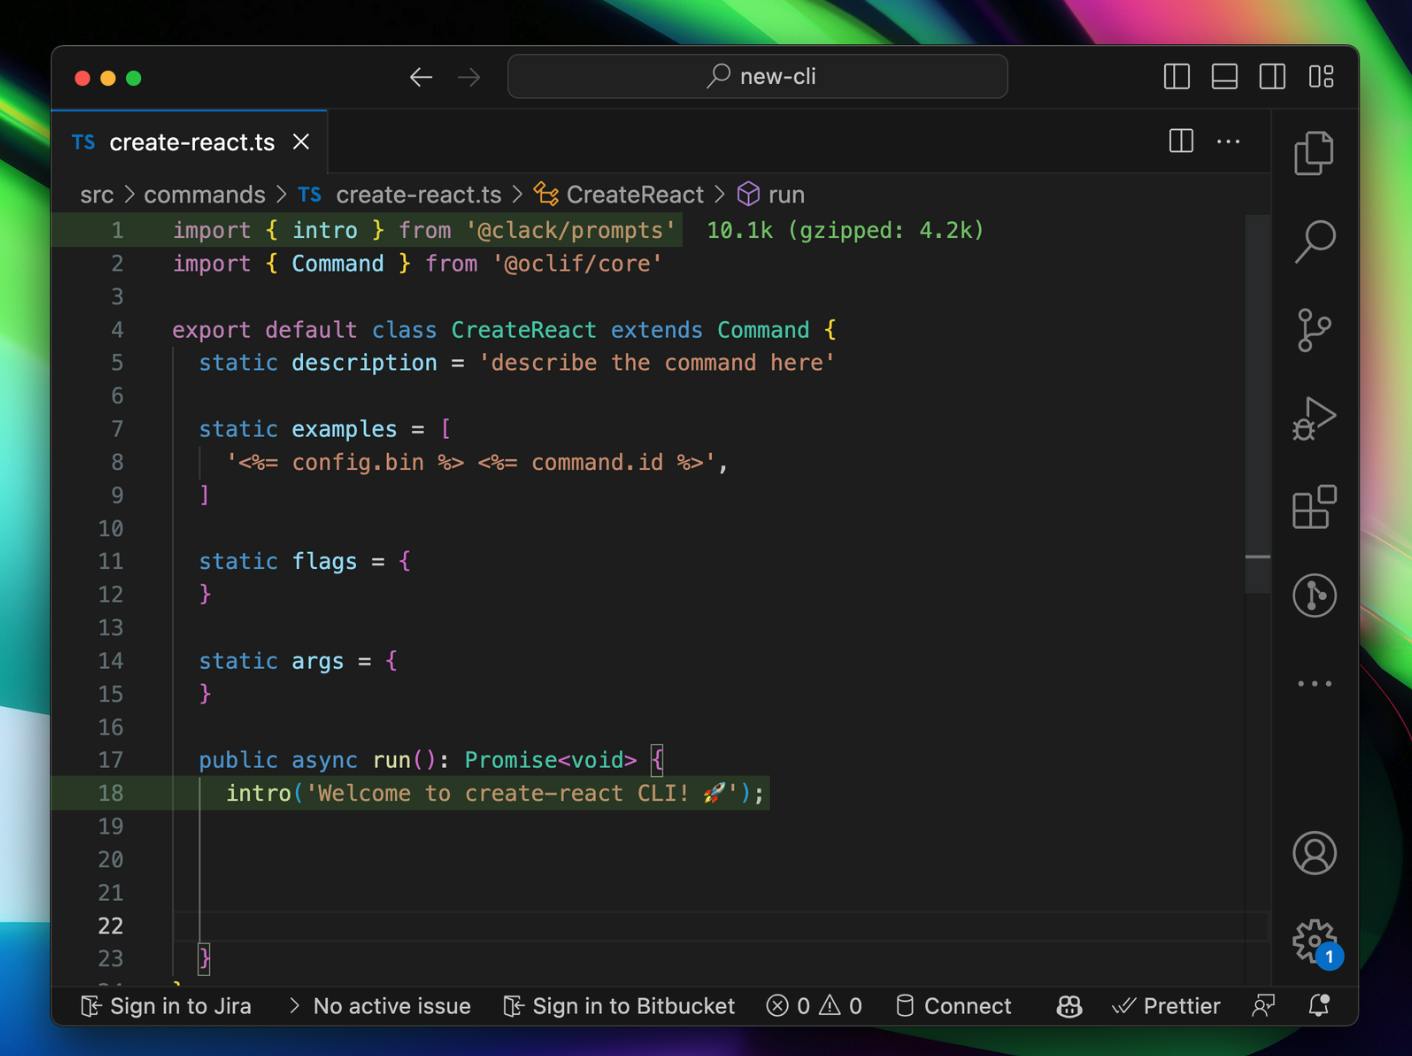
Yes I like emojis in CLIs - sorry
Now, build the project and test it out.
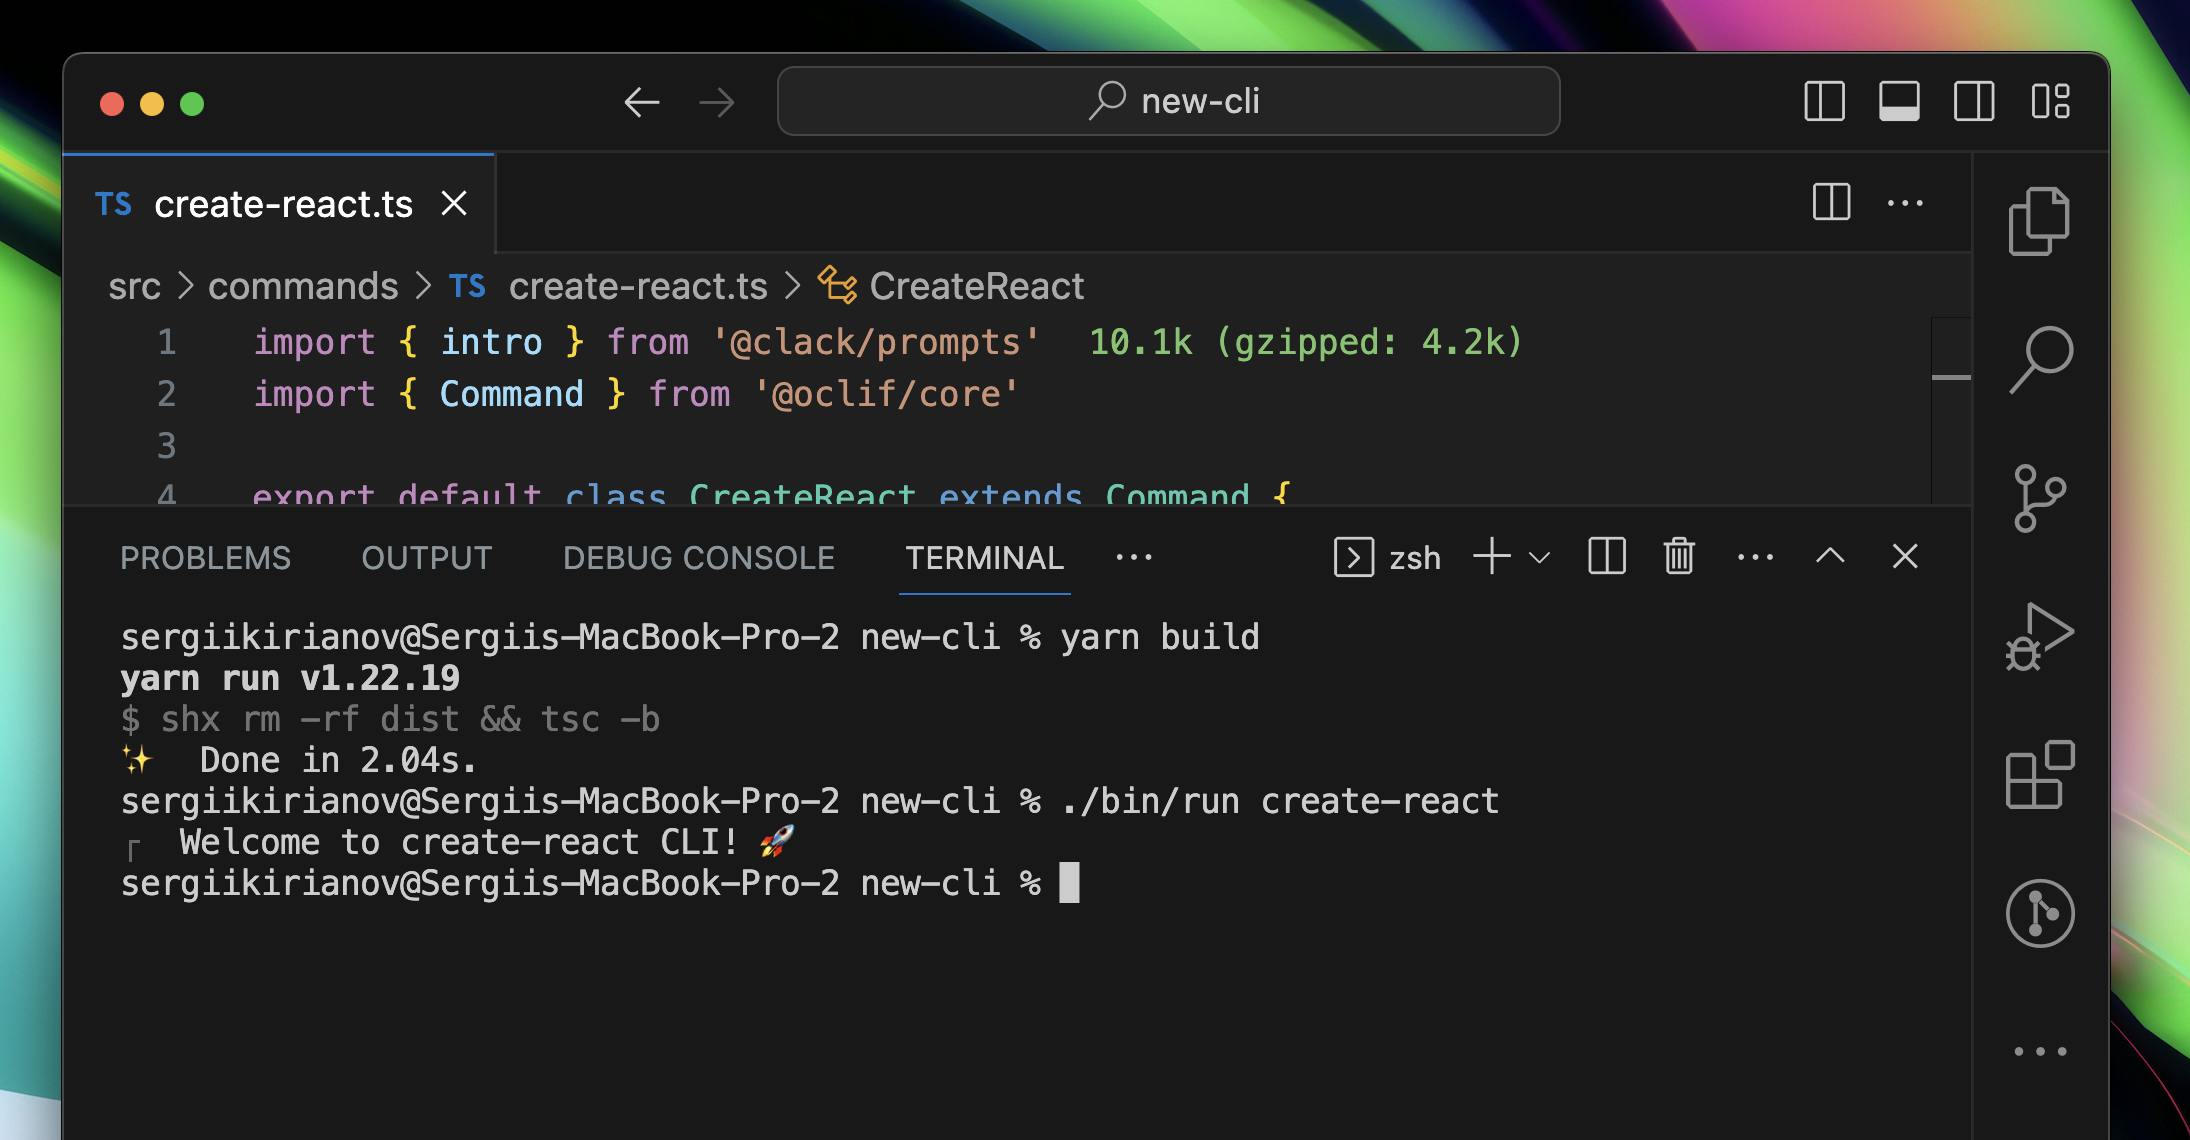
Ah, the feeling of success 🥰
Don't forget to always run
buildcommand before you test your CLI
Prompting the user
Okay, for the next step, we will need to code a bit more! Let's prompt a user for the new project directory's name. For this, we will use text() the method from @clack/prompts. It allows us to ask the user a question and receive a response in a text format. Don't forget though, that we will need to add at least some validation to it in order for the user not to provide a directory name that cannot be created 😉
const dirName = await text({
  message: 'What is the name of your project?',
  initialValue: 'my-app',
  validate: (value) => {
    const regex = new RegExp('^[a-zA-Z-]+$');

    if (!value) {
      return 'Directory name is required 👀';
    } else if (!regex.test(value)) {
      return 'Directory name may only contain letters and dashes 😬';
    }
  }
});
So, we have a message, initial value (placeholder), and simple regex validation. Awesome, let's build an app and try it out!
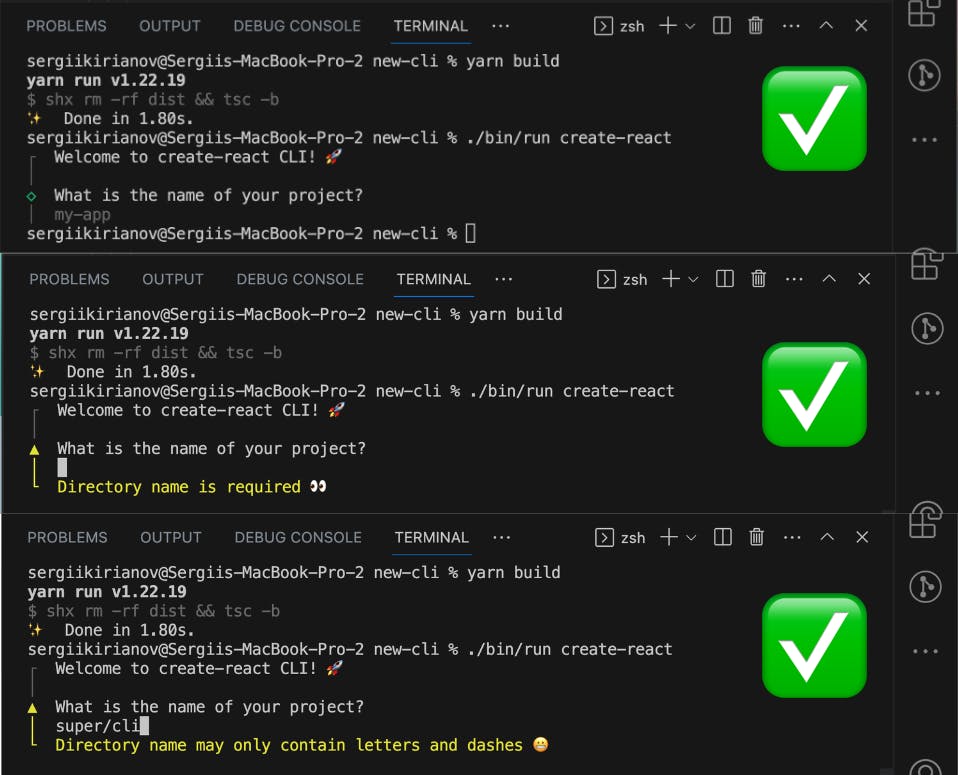
Everything works as expected! Validation works too! Amazing!
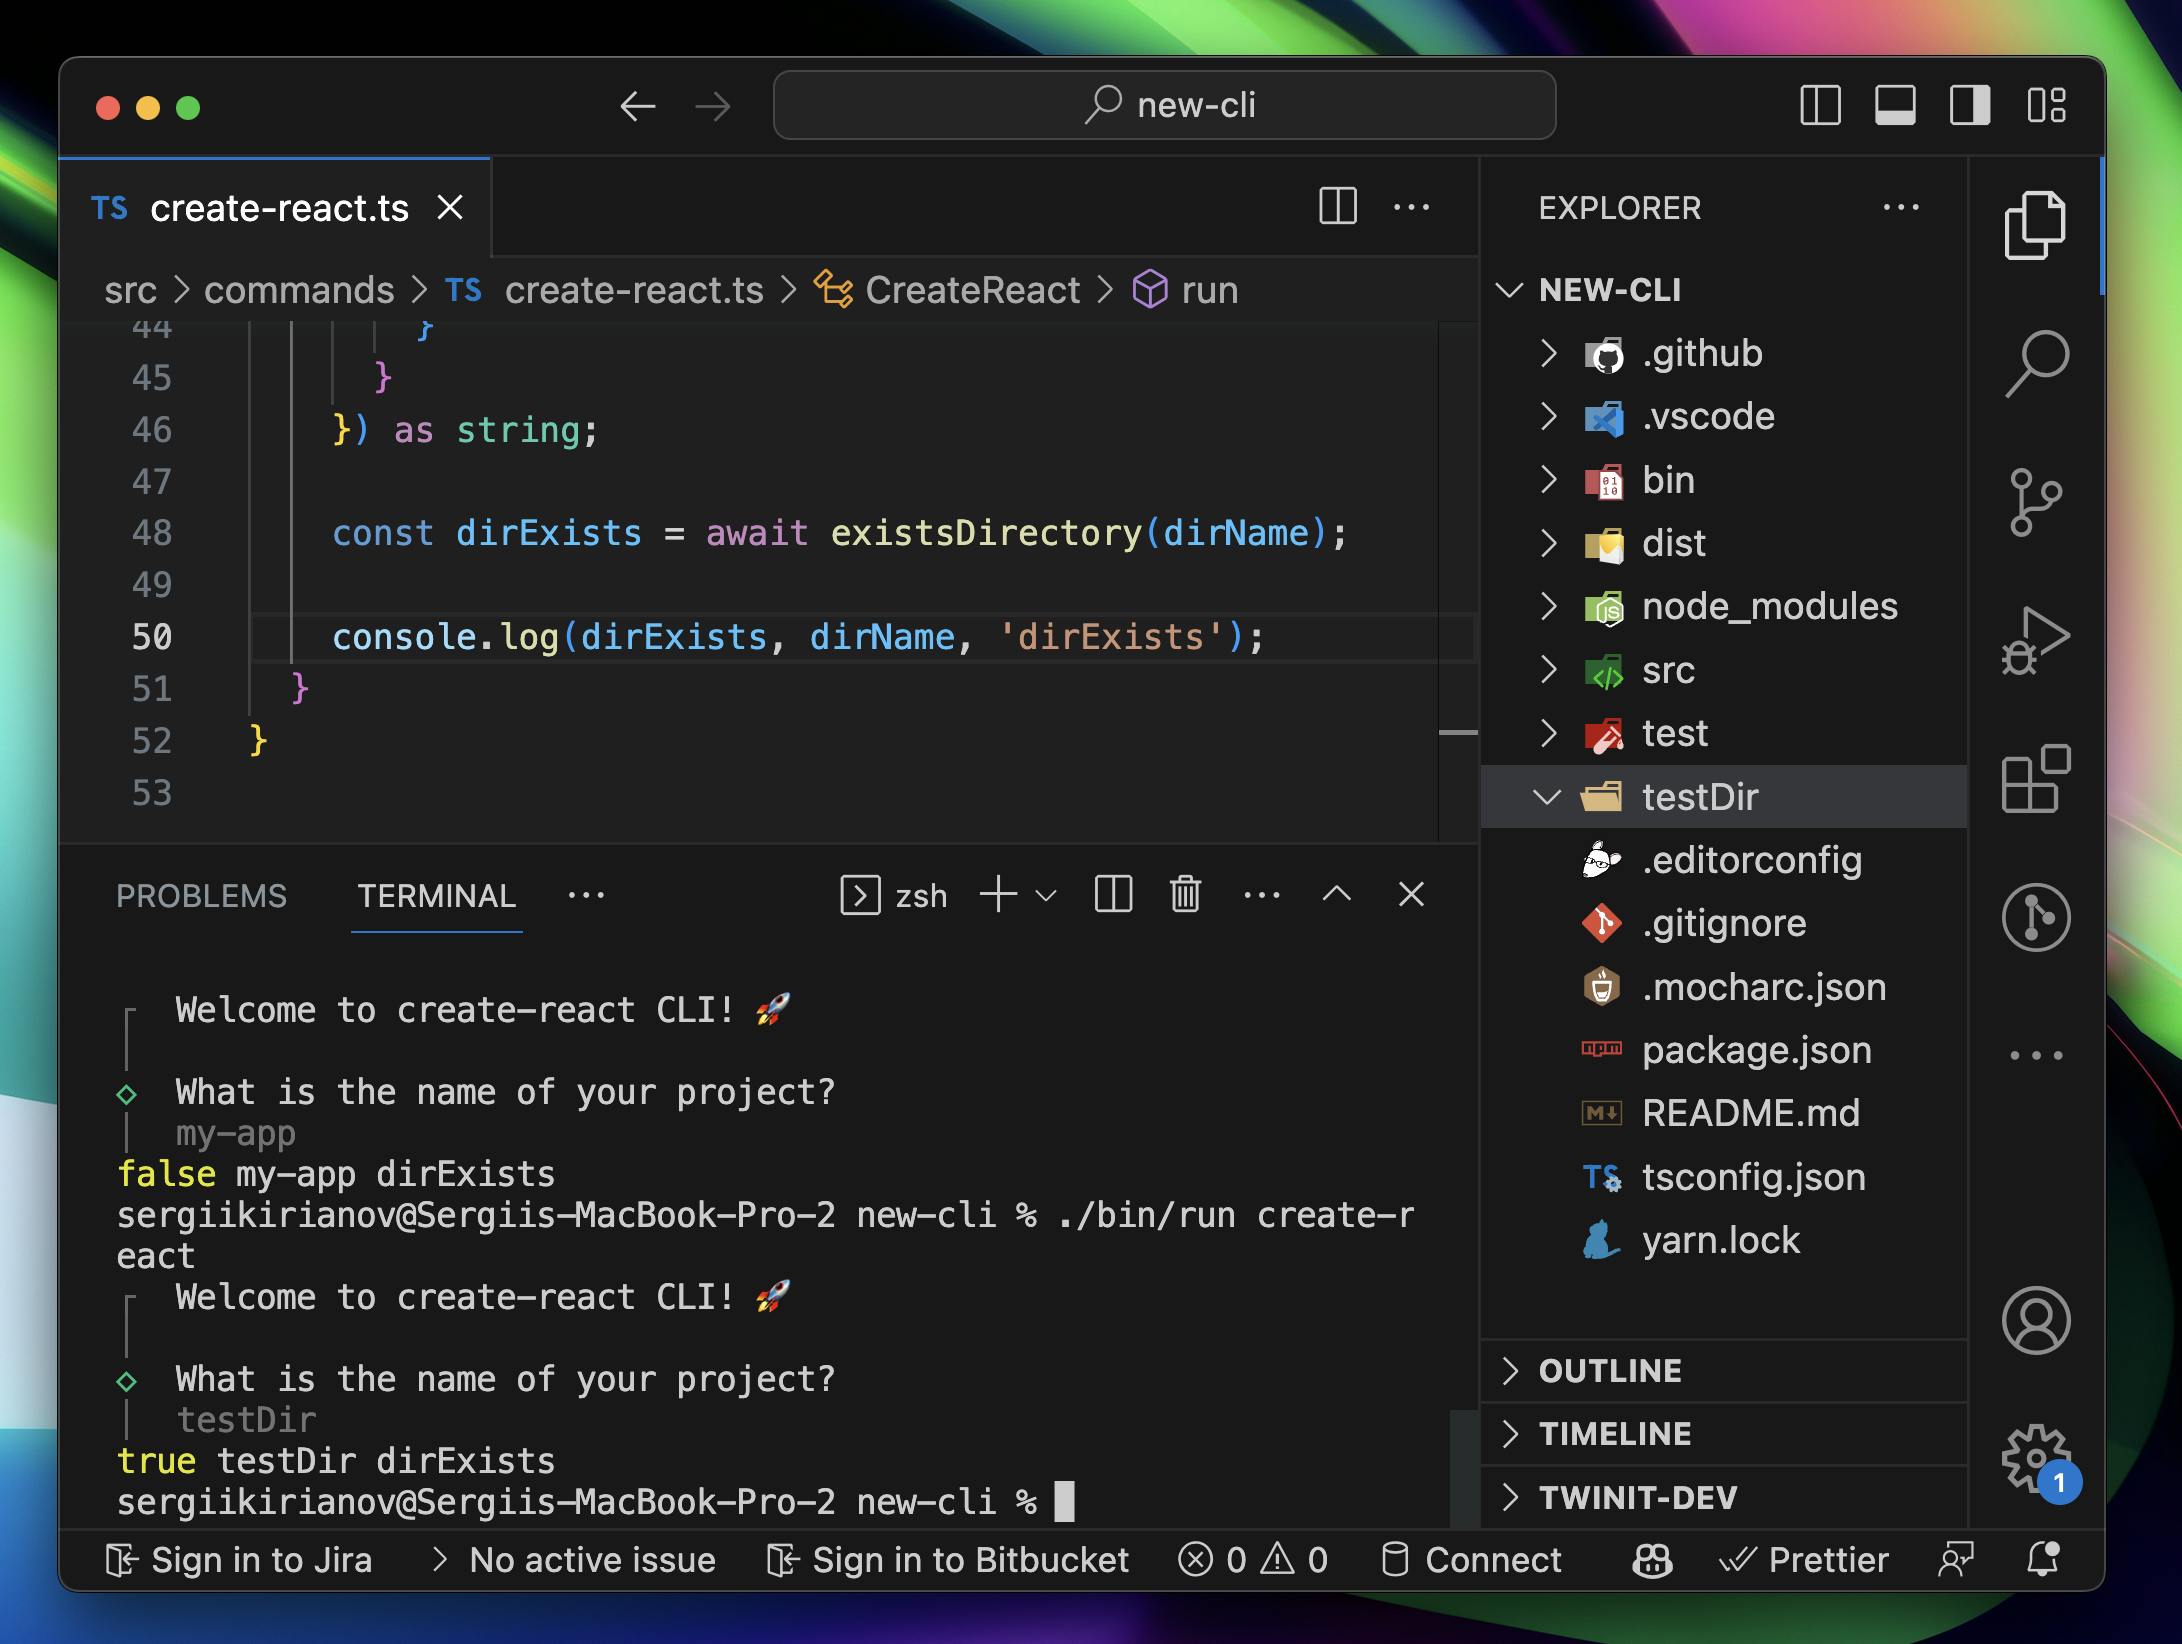
But it's too early to celebrate, first, we need to check what if a folder with such a name already exists. I recommend always checking for that and asking the user if they want to override it or use another name for their project. Let's not overcomplicate it this time, we will simply check if the folder exists, and, if yes, we, simply, exit the application and print the user that the folder with this name already exists.
Let's add this dirExist handle function.
import * as fs from 'fs';

// add this outside of the class CreateReact
// or add in the external file and import function to the
// file with class CreateReact
const existsDirectory = async (path: string): Promise<boolean> => {
  try {
    await fs.promises.access(path);

    const stats = await fs.promises.lstat(path);

    return stats.isDirectory();
  } catch {
    return false;
  }
};
So, now when we pass a dirName to this function, it will check if the directory exists and will return a boolean value. Let's test it out. I have created a test directory testDir inside the project's root directory.
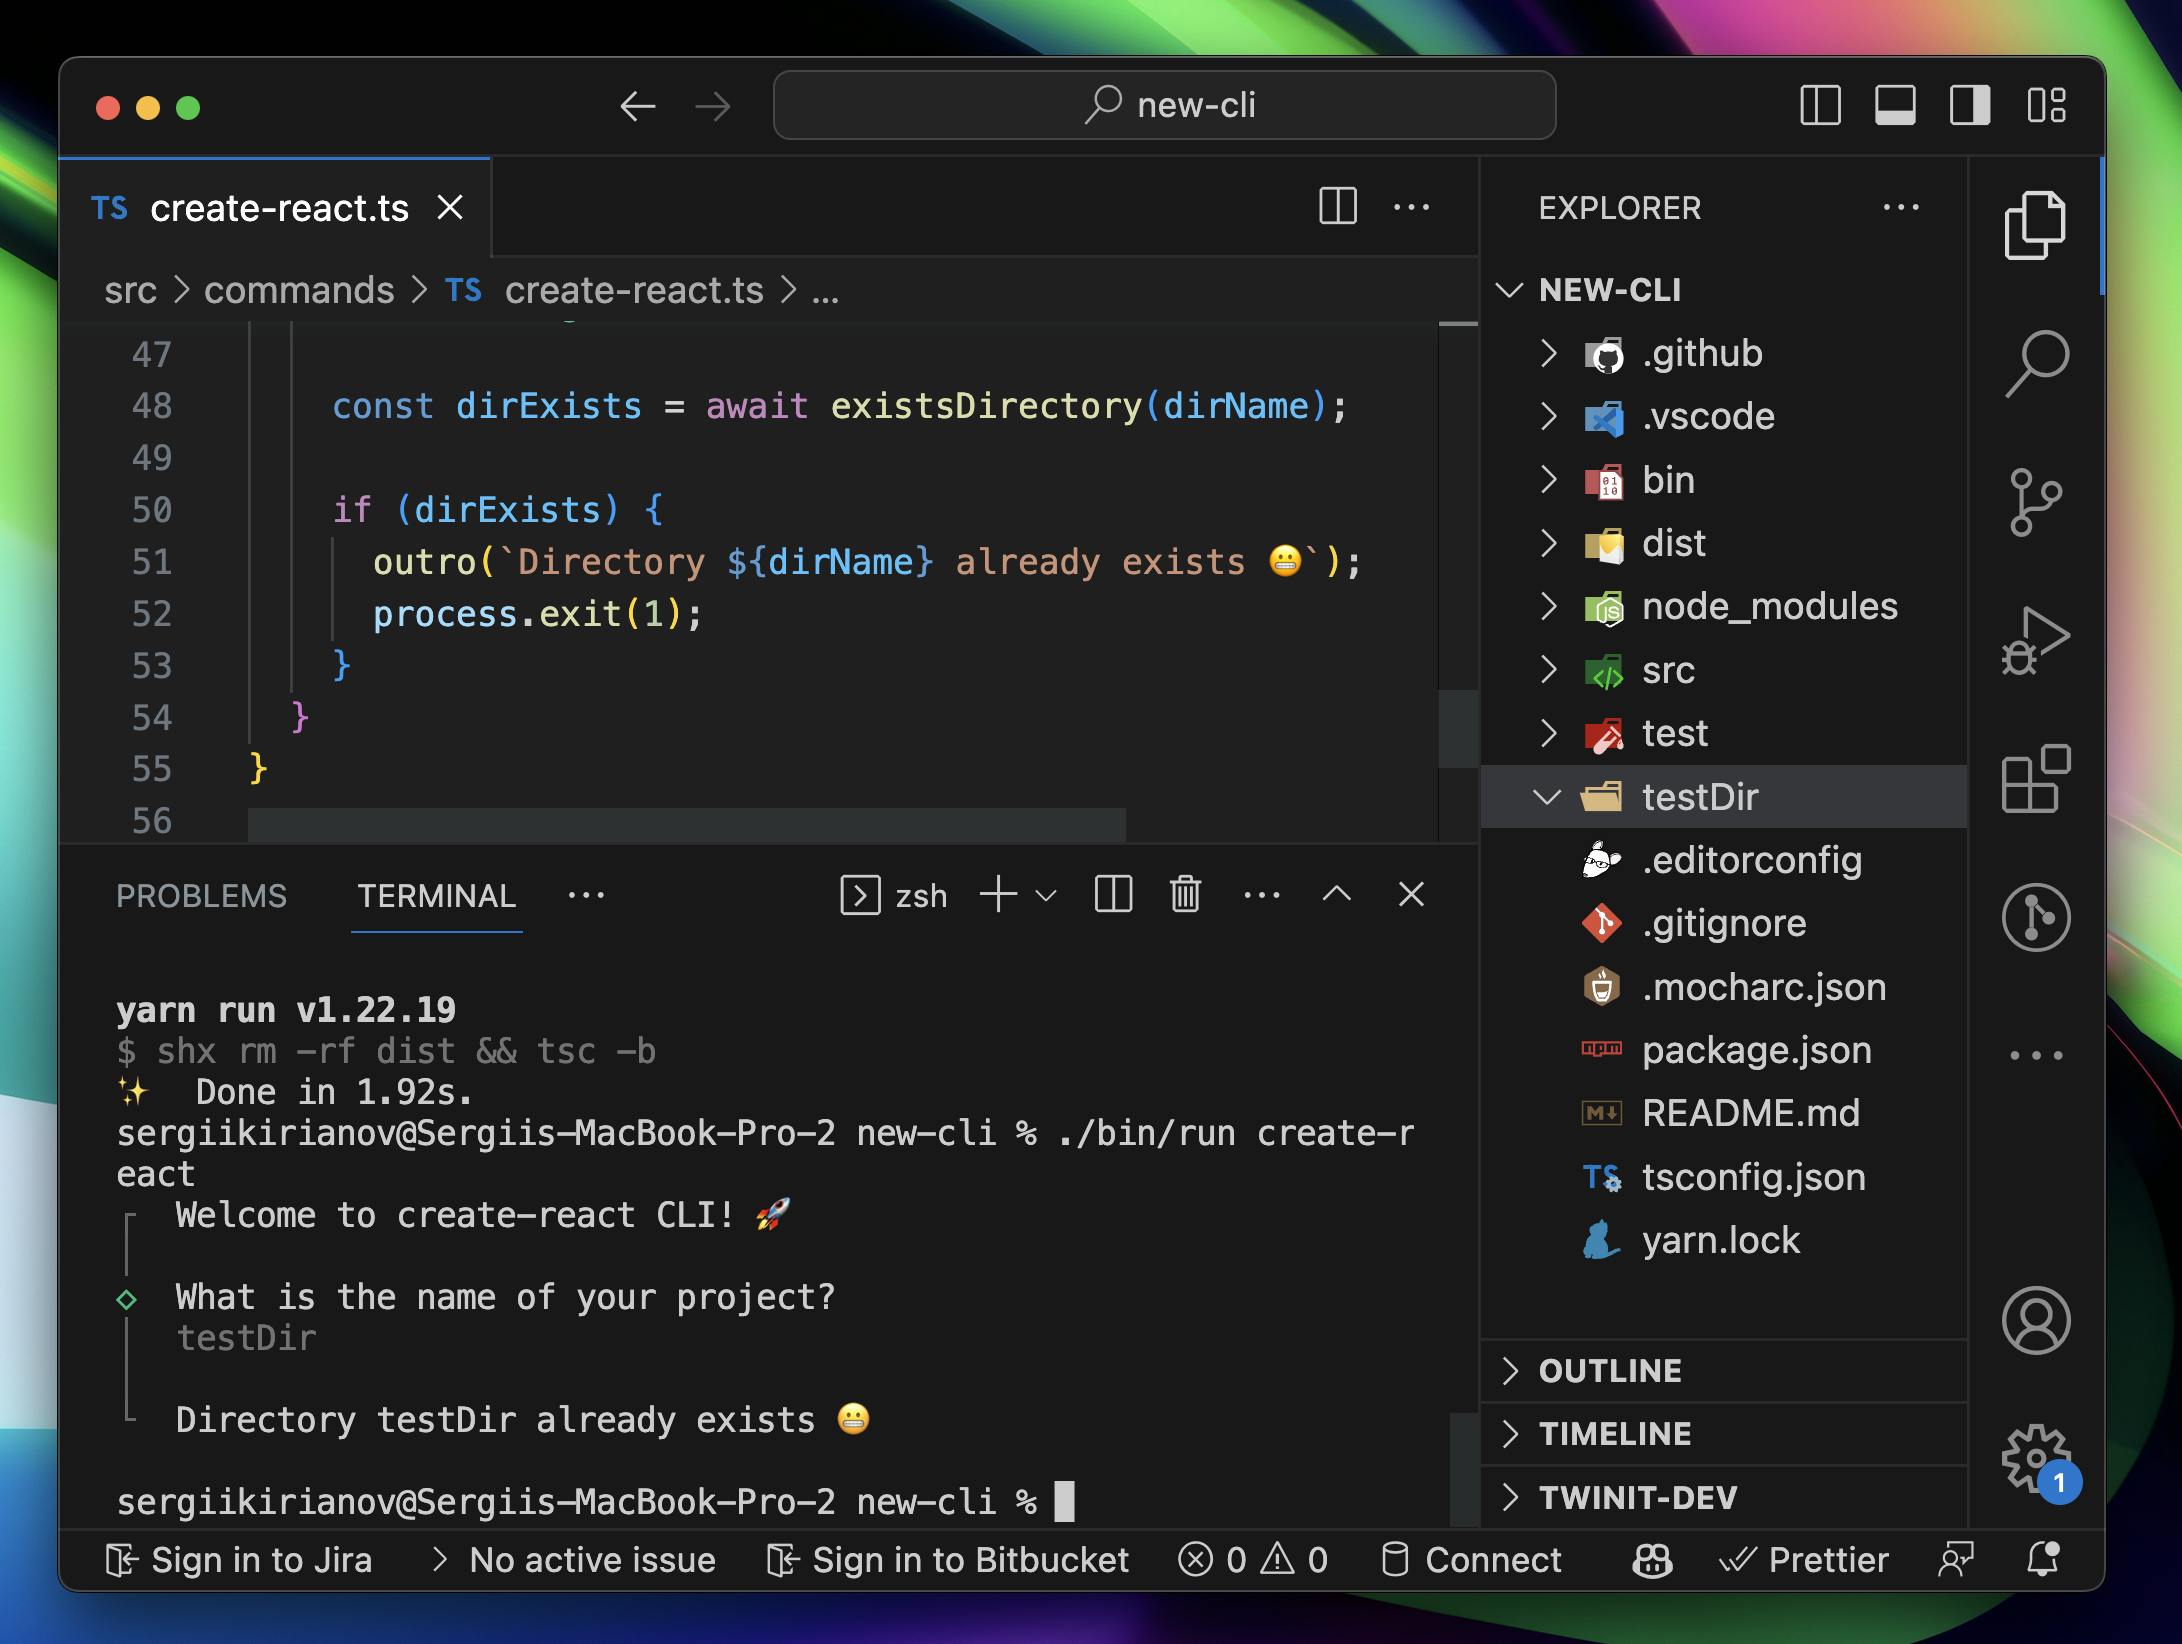
Cool, I'll also add handling of falsy value. If a directory exists, let's finish the program and exit the process.
import { intro, outro, text } from '@clack/prompts'
// I added outro method from the package for beatiful end message

if (dirExists) {
  outro(`Directory ${dirName} already exists 😬`);
  process.exit(1);
}
Last build and test.
Okay, now we need to prompt the user whether they want to generate a new React or React TypeScript project - usually, if you want the user to select one or another you will use the select UI, @clack/prompts is here to help. Import select from @clack/prompts and add it to your code.
A rule of thumb is that every method that requires user's action will return a Promise, so we must await the response
import { intro, select } from '@clack/prompts';

// inside run() function after intro()
const template = await select({
  message: 'Select a language of your new project',
  options: [
    { label: 'TypeScript', value: 'typescript' },
    { label: 'JavaScript', value: 'javascript' },
   ],
  initialValue: 'typescript',
});
Okay, as you can see our CLI gets better and looks beautiful!

We are almost done! Now, the easiest part, actually!
Cloning repo from GitHub
In order to clone the repo from GitHub we will be using isomorphic-git package - this library allows you to use a lot of different GitHub actions and functions. What we care about the most is the clone method. Let's start building a GitHub clone function!
I will create it in a separate helper file and import into the main command file.
import * as fs from 'fs';
import git from 'isomorphic-git';
import http from 'isomorphic-git/http/node';

type Options = {
  dirName: string;
  gitRepositoryURL: string;
};

/** Clones git repository to the project directory displaying a progress bar. */
export const cloneGitRepository = async (options: Options): Promise<void> => {
  const { dirName, gitRepositoryURL } = options;

  await git.clone({
    fs,
    http,
    dir: dirName,
    url: gitRepositoryURL,
    singleBranch: true
  });
};
In our command file, let's import cloneGitRepository function and add githubRepos an object with a URL to actual repositories.
import { cloneGitRepository } from '../utils/helper';

const githubRepos = {
  typescript: 'https://github.com/skirianov/vite-react-ts-template',
  javascript: 'https://github.com/skirianov/vite-react-template',
}
We will need to make one more change - in order for TypeScript to be happy about us using string from the @clack/prompts text method, we should use type assertion and change the string | symbol type to the type of keys of githubRepos object.
const template = await select({
  message: 'Select a language of your new project',
  options: [
    { label: 'TypeScript', value: 'typescript' },
    { label: 'JavaScript', value: 'javascript' },
  ],
  initialValue: 'typescript',
}) as unknown as keyof typeof githubRepos;
Now, this works, but the user won't know if we are actually doing something in the background and they might think that CLI is stuck. In order to provide better UX let's add a spinner!
import { intro, outro, select, text, spinner } from '@clack/prompts'

const sp = spinner();
sp.start('Cloning git repository 🔁');

await cloneGitRepository({
  dirName,
  gitRepositoryURL: githubRepos[template],
})

sp.stop('Git repository cloned! 🎉');
So what do we have now? Our new function will clone a GitHub repository inside the newly created folder dirName.
Before we run our newly created CLI, let's just add another outro at the end of the program to notify the user that everything is successful.
// add after the sp.stop() method
outro("Let's start coding! 🚀");
Let's build and test it 👀
![[video-to-gif output image]](https://im4.ezgif.com/tmp/ezgif-4-690b842dab.gif)
Woooohoooo 🎉 It works! What a great feeling, ha?!
Congrats! You just built your first real-world CLI application and it wasn't even that hard, right?
Conclusions
We have done a lot of work, but we have done a great job, really! In the next article, we will continue building this application, we still have to add Tailwind generation and install dependencies, you remember. And, of course, we will learn how to publish the CLI to the npm registry, so that anyone can use it.
btw, you will notice that you can't push generated application inside your project, we will talk about it in the next part, stay tuned ;)
Thanks for going so far with the article. Ask your questions in the comments, give me a follow not to miss the next article, and of course, give me a follow on Twitter.
Resources:
https://oclif.io/ - Oclif official website
https://github.com/natemoo-re/clack/tree/main/packages/prompts -
@clack/promptshttps://github.com/skirianov/build-cli-clack-oclif-article - finished CLI app